|
|
Cherupayar Payasam – A rustic beauty from the home kitchens of my native land where in, the green pearls get dressed up in the silky coconut milk , along with the seductress dark beauty, jaggery and perfumed by the sweet scent of crushed cardamom and divine ghee.
A favourite of mine and someone else too….. none other than the first man in my life, my father. Along with the many passions he shared with me, he also passed me the gene to take delight in some real old world beauties, some classics from the dark kitchens of yore, like this Payasam, Poruthal Ada, and the temple Payasam - Panachamritham from the Pazhani Temple of Tamil Nadu. Few of these tasty treasures bring out the kid in my father …….bring smiles on my face thinking about those close-to-my heart moments we shared. Those happy moments of the past, make me look out of the window and walk in the valley of memories and am sure, I may never complete writing this post, not being capable of capturing those emotions in right words!
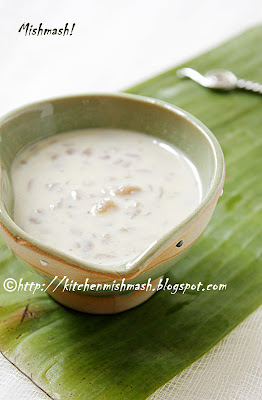
 Before I move to the recipe, let me explain the difference in the pictures above: When my parents visited us in 2009, they brought some naadan sharkkara, the jaggery available in the stores in Kerala and Payasam on the right was cooked using the same. When I prepared it a couple of weeks back ( the one on the left), I used the jaggery available in my local Indian grocery store, and its is quite darker in shade and also tastes slightly different , to be specific more overpowering than the ones we get in Kerala. The darker shade of my Payasam is often a point of query in one of my previous posts too and I hope, this explanation justifies. As for the consistency part – my preparation looks thicker than the one my mother made and that’s because I photographed my version much later in the day after making it and by then , it had become little thick. These types of Payasam tend to get thicker as the resting window expands and one way to dilute is by adding more coconut milk and bring to boil again, just before serving. Though implied, let me write it clearly that one should aim for the consistency in my mother’s preparation.
Traditionally, any type of Payasam (a traditional dessert that is made similar to a rice pudding, but with a consistency of a thick milk-shake) is prepared in a big Uruli, a wide mouthed bell metal vessel and this particular one is made using freshly extracted coconut milk , of various consistencies, added to the mixture of green grams sweetened with jaggery and a small amount of grated coconut, cooked down to a very thick consistency. At my place, the same mixture of sweetened green grams is used for making another traditional snack called Sughian which is deep fried fritters, using the same mixture as filling. So when Mummy prepared it last time, she used the same mixture prepared for Sughian and added coconut milk and finished it with a drizzle of ghee and ghee fried coconut chips and cashew nuts. This time when I made it I took a short cut ‘coz of lack of time, using some of the leftover cooked green grams , frozen grated coconut, refrigerated melted jaggery and canned coconut milk. Kindly check the notes below , if you re using freshly squeezed coconut milk.
 Here’s how I made it.
Ingredients: (Approx.) - ¾- 1 cup cooked cherupayar/green grams/whole moon bean, without salt
- ½ cup melted and filtered jaggery (as per the sweetness)
- 2 tbsp grated coconut
- A pinch of salt
- ½ cup canned coconut milk , diluted with ½ cup water
- ¼ cup canned coconut milk , diluted with 2 tbsp water
- 4 pods of green cardamom, crushed
- 1 tsp + 1 ½ tbsp ghee/clarified butter
- 2 tbsp Thangakothu / coconut slices/cuts
- 2 tbsp broken cashew nuts.
Directions: - In a wide sauce pot, heat melted and filtered jaggery; when it is hot add the grated coconut with a pinch of salt and stir for about 2 minutes and then add the cooked cherupayar/green grams. As you let it cook in low heat, keep mashing the cooked cherupayar/green grams, with the back of a wooden spoon, until the mixture reaches a very thick and almost dry consistency; At this stage, when you keep stirring, it becomes a huge round mass. At this point, add 1 tsp ghee and crushed cardamom. (Note: If you decide to finish the rest of the cooking later, you may turn off the stove now and let it come to room temperature, before refrigerating the cooked mixture. Its refrigeration life depends on how well you cooked down the mixture to an almost dry consistency.) Now dilute ½ cup of canned coconut milk with ½ cup of water and pour it to the sweetened mixture and loosen it; let it come to a boil, and let everything bubble together in very low simmering heat. Now, add the thick coconut milk (¼ cup canned coconut milk , diluted with 2 tbsp water) and bring to a boil and again simmer for few more minutes. You can turn off the stove when it still has a liquid consistency (as Cherupayar Payasam like many of its siblings, tend to thicken as they rest ).
- In another small pan, heat 1½ tbsp ghee and fry some broken cashews and keep aside; fry some small coconut slices/Thangakothu, till its turns golden brown in colour and pour everything, both the broken cashews and coconut slices, including the leftover ghee to the Payasam and serve warm after 30 minutes.
Notes: Please note that the taste of this Payasam is purely dependent on the Sharkkara/jaggery – coconut milk proportion and hence go generous on the latter but use jaggery according to your sweet tolerance. Coconut milk is a significant ingredient in enhancing the taste. The above measurement is as per our family’s taste preferences; feel free to adjust the proportions. This tastes better if you are using freshly squeezed coconut milk but canned coconut milk, diluted with water, is also good. Also, please keep in mind that those using freshly extracted coconut-milk, should be going for more quantity as the consistency of the canned one is totally different from the freshly squeezed one; hence make changes accordingly as coconut-milk is the taste enhancer here. Adjust the number of crushed cardamoms based on its strength. Some home grown ones are quite strong.
Luv Shn
|
No part of the content ( articles, photographs, recipes) of this blog may be reproduced without my written permission.Copyright © 2007-2010 Kitchenmishmash.blogspot.com. All rights reserved.
|
 We have’nt met you…..
We don’t know who you are……
We don’t know where you are ……
Yet…
You make us smile ,
You make us laugh,
You shower us with words of love and warmth,
You make us feel special !
We wish we could celebrate these holidays with you!
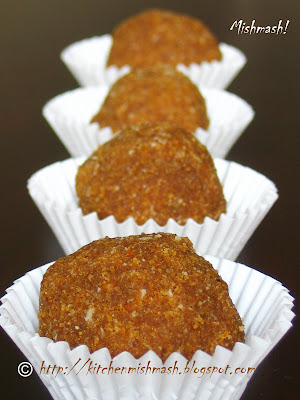
We send you a box full of season’s best wishes and some rum balls to spike up the holiday spirits!
 LuvShn, CJJ & Little King
|
No part of the content ( articles, photographs, recipes) of this blog may be reproduced without my written permission.Copyright © 2007-2010 Kitchenmishmash.blogspot.com. All rights reserved.
|
 It’s been more than 7 months since my last post!! I don’t know where to start.....it would be an understatement if I say, I was overwhelmed seeing your messages on my last one and the bunch of emails I received…..those thoughtful wishes, messages loaded with words of love and prayers, kisses and hugs sent across for our little boy, that bit of happiness you felt for us brought a lump in my throat…..At one point of time, I even wondered whether it was my post-delivery hormones playing pranks on me…….but even now when I read those messages, they evoke the same intense feelings…….the feeling that someone in some corner of the world, who have known us just through this little space and the words I pour out here, care for us and have given us a place in their hearts!! The realization of the same was more than touching and I had no clue how to express those emotions and feelings. I kept pushing the idea of updating this place not knowing the right way to express my gratitude……..and soon it happened…I fell in love, again!!!!
Yes, I have fallen in love ..... with those winning toothless smiles, those tiny toes that remind me of the flutters and soft kicks I felt around the same time in last July, those itty-bitty fingers reaching for my ringlets, and those ‘ bulb eyes’ that beams up as he smiles……aww, I never imagined parenthood is such a blissful state! Little King sure knows how to charm me with those innocent batting of eye lashes, his continuous jabbering and squealing. His squeals have become so loud that, few weeks back, I had to close the windows and doors for fear of our neighbours getting wrong signals!!
I must say we re greedy parents; we create opportunities to see the twinkle in his eyes and the glow on his face. Every now and then we deliberately pass the picture wall with his framed portraits and it just fills our hearts when he blushes and gently falls on to my shoulders with a tinge of shyness in his eyes and then with hands around my neck, he hugs me tighter and tighter :)
When I am exhausted, I take him to the balcony and Mother Nature seems to be happy to take him into her lap. He watches leafy branches of apple trees and pines and maples dancing to the soft music of mother natures’ lullaby, without taking his eyes off. He smiles charmingly as the breeze caresses his soft cheeks as though She whispered something sweet to him. She also sends out feathery friends to sing songs for him and his eyes follow them quickly as they flutter and fly away. On rare occasions, She amazes us with a special treat by letting the clouds embrace the sun for a while, to create a dreamlike setting where bunny rabbits happily move around chewing on leafy weeds , baby squirrels run in between the lined pine trees and birds walk freely on the green carpet…. Absolutely surreal!
 As much as I enjoy this absolute parental bliss, a part of me miss writing here! But, as I read somewhere recently, my brain at this point is a tabula rasa, a completely blank slate. At times I feel I have lost self motivation and that’s probably because I do not have the time and energy to get inspired by a dish , collect and compile my thoughts and taste memories revolving the same. Yet, there ‘re days when I find myself sharing a moment with CJJ in the kitchen and bursting into laughter reminiscing the follies of my early years in kitchen. At that point, I remind myself that I have to record and capture that particular piece from the past here in my online journal and even before I know, it is buried under a pile of top priority stuff. And there are times when a fresh new comment leads to older posts and wading through the comment section, I rediscover those affection in your words, the appreciation you showered me with……and at that moment, all I want to do is start writing and connect with the hundreds out there who helped to get this place going on even when I didn't have a clue as to where I was taking this blog. And exactly at that time, I am either reminded of my must-complete-basic essential- list or I hear a hyper-active squeal from the baby monitor!
Lack of time, energy, and self-motivation, poorly captured photographs, recipes without any exact measurements and moreover, a completely empty brain…..I know it is not an ideal recipe to run a food blog or perhaps, a perfect recipe for a blog-shutdown, Nevertheless, as someone who believes in the old wise saying, “If there’s a will, there’s a way”, I have decided to give it a try !! I owe it to my mother who cooked up many of my favorites during her stay here, saying that I can feature those items later when I am busy with the baby …I owe it to my mother –in law who got excited learning about my blog and shared some old rustic fare from her kitchen, even one from her grandmother’s favourite list, though most of those recipes lack accurate measurements ……I owe it to a bunch of readers out there who sent me long forgotten recipes from their families which are still waiting for their turn in my yet-to-post folder……and last but not the least, I owe it to you for your continued support and affection.
And let me say THANKS with this quick and easy dessert I picked out to cook and blog just for you, as it fitted perfectly into my tiring schedule.
Roasted Apricots with Honey-Vanilla Crème Fraiche
(Recipe Source:Bon Appetit Magazine – Issue: June 2010 – Pg:44)
Ingredients: - 1 cup (packed) golden brown sugar
- 1 tsp ground cardamom
- 12 small apricots (about 1 ½ pounds) halved, pitted ( I again cut them into small wedges)
- 3 ½ tbsp honey
- 2 tbsp unsalted butter, diced
- 8 oz crème fraiche or sour crème
- 2 tsp vanilla extract
- ¼ cup water
Directions: - Preheat oven to 425 F. Mix brown sugar and cardamom in 11*7*2inch glass baking dish. Add apricots and pour ¼ cup water and 2 tbsp honey over fruit. At this point, I mixed very gently with a spatula. Now, dot with butter and roast until apricots are tender, occasionally basting with syrup in dish, for about 12- 15 mts.
- Let it cool 5 mts after taking out of the oven.
- Whisk crème fraiche , remaining 1 ½ tbsp honey and vanilla in small bowl.
- To serve: Divide warm apricots and syrup among small 6 bowls; spoon honey –vanilla crème fraiche over and serve.
My thoughts for a quicker version: You may dip the stone fruit in butter first, and then in the cinnamon flavored brown sugar and grill for few minutes , until fruits are tender and serve with vanilla and honey flavored crème fraiche or just some good old ice cream…perfect for outdoor grilling parties or a late night dessert craving.

This dessert and wild flowers are FOR YOU as a token of our heartfelt gratitude for being there for us and for being patient and keeping this place alive in our absence…
Thank You! Shn
|
No part of the content ( articles, photographs, recipes) of this blog may be reproduced without my written permission.Copyright © 2007-2010 Kitchenmishmash.blogspot.com. All rights reserved.
|
 As I wrote in my previous post, I fall in love with recipes that comes with a story and history, which gives them a soul and character of its own, no matter how simple the recipe is. Such recipes take me to a bygone era I have not been part of. That’s what happens most of the time when I approach the elderly men and women in our family for recipes and dishes cooked during their childhood……at times, they have a story to accompany the recipe…..memories to share …take pride in the tools and techniques they possess passed down to them by their mothers, grandmas or great grandmas.
By collecting such recipes handed down from generations to generations in our family, I have been making a humble attempt to connect with my roots as well and pass on the baton, pass on that tiny slice of the past to the future generations in our family, if at any point of time they get curious as to what we cooked and ate or what their grand-parents and great grand-parents preferred for breakfast or dinner or how the family traditions associated with certain festivals evolved. Perhaps, it might be my wishful thinking but no harm in staying on the optimistic side, right?
However, it is not just the recipes passed down to us that I love to cherish….there are some other things too…..a few of my favourite things which I have inherited from my family…..those things that come under the category of heirloom, things that speak volumes for itself and the family. Some of those treasures include those flimsy old leaflets of Thaliyola/palm-leaf manuscripts from my grandfather’s collection…….the bell metal vessels used by grandmas from both my paternal and maternal sides……those faded sepia pictures from the family album…..
………and one among those priceless possessions is this Achu/mould my mother gave me recently …….a special mould used particularly for making the crispy, crunchy, deep fried old world snack, Achappam, Kerala style rosettes……a tool and a recipe her mother passed on to her has now come to my collection. As much as I look at it as a treasure, I must admit that one thing she can’t pass on to me that easily is the skill to execute the tool and the recipe. And I realized it a couple of months back as I watched my mother frying up a batch of Achappam, with the deftness and dexterity that made me wonder if I would ever be able attain that level of skill, experience and presence of mind!!
 As I wrote for Kuzhalappam, Achappam is also a popular snack that you come across during festival times like Onam or X’mas or stacked neatly and wrapped in clear plastic at bakeries and Ulsava-parambu/fare grounds, or as part of the spread on the eve of marriage/Kalyana Thalennu, or to fill up those huge snack tins carrying variety of snacks and sweets, taken by the newly-weds when they go to their in-laws house etc…..
Making Achappam is a tricky affair, something that comes to perfection only with the use of fine rice flour, right consistency of batter and ofcourse, practice. Achappam you see in my pictures lacks a bit of its finesse as my mother had to work with the ingredients and utensils available in hand, coming up with alternatives and substitutions. Generally, it is made using “ nalla nermayulla varukkatha pachari podi” , a fine raw rice flour which is not roasted. Since that was not available at home, my mother soaked some raw rice grains for an hour in water, drained it and let it dry a bit for around 20-30 minutes and then ground to a fine powder which she sieved using a very fine sieve. The finer the sieve, the finer the rice flour would be and even finer the texture of Achappam. If the batter is too thick like dosa/Indian pancake batter, then it is difficult to separate Achu/mould from the semi cooked , semi crisp fried dough and also it won’t have the right crunchy texture. Am just listing out the ingredients and method my mother followed thinking that someday I would gain the courage and skill to try it on my own!
 Ingredients: ( Approx.) - 1 cup rice flour/pacha-podi ( Not roasted)
- About ½ cup coconut milk, medium consistency
- 2 ½ tsp egg, beaten lightly
- Sugar, little less than 1/8 cup
- 1 heaping tsp black sesame seeds/ellu, lightly roasted/heated
- ¼ tsp cumin seeds/jeerakam
- Oil for deep frying
Directions: - Mix all the ingredients to the consistency of a batter- not as thick as dosa/Indian pancake batter- and leave it on the kitchen counter for around 20 minutes.
- Heat oil in a small wok or sauce pot; as soon as you turn on the stove, drop the Achu/mould into the oil, and let it heat up along with the oil. In the meantime, transfer a small batch of batter to a small container; this way, you do not change the consistency of the batter as you keep dropping the oil coated hot Achu/mould every time into the batter.
- When oil is really hot enough for deep frying - check by pouring a tiny drop of batter into the oil and see if it is coming up to the top immediately and sizzling and spitting in hot oil – lift off the Achu/mould from the hot oil and shake off the excess oil and then slowly dip Achu/mould in the batter (the one in the small container and hearing that “shhhh…shhhhoooo” sound is natural at this stage) for a second only till halfway ( DO NOT dip the Achu/mould fully into the batter) and then immediately drop the batter dipped Achu/mould back into the hot pool. At this point, you will notice numerous bubbles forming around the Achu/mould, as shown in the pictorial. Wait for about 30-40 seconds and gently shake off the Achu/mould and if you got the batter consistency right, you will see the semi-cooked Achappam coming off the Achu/mould easily; if you re having some trouble , try to separate the Achu/mould by gently pushing with a wooden skewer and it will come off easily; then let it cook until crisp and golden brown, by flipping each side. Keep adjusting the heat, otherwise it would get burnt fast. When it is fried enough, remove with a slotted spoon and let it drain on a paper towel. When it is completely cool, it gains more crunch and you can store them in an airtight container.
- Keep repeating this step for the entire batch of batter and if your wok is big enough, continue to place the Achu/mould, in the hot oil itself after shaking off the semi cooked ones from it. Otherwise, please make sure that Achu/mould is heated properly in oil before dipping into the batter each time.
Related Posts:
Luv Shn
|
No part of the content ( articles, photographs, recipes) of this blog may be reproduced without my written permission.Copyright © 2007-2010 Kitchenmishmash.blogspot.com. All rights reserved.
|
At times, some people we come across at various phases in life leave a long lasting impression on us, no matter how short the span of interaction was….it could be just a one time meeting or a day’s interaction or for a season or more…..they touch our lives and leave their handprints and become part of our life and memory.
This post is about one such person and her mother who are part of my college life and still holds a special place in my heart…….because that mother once served me one of the tastiest and yet simplest payasam/milk pudding for the first time in my life…..from then onwards , that particular dessert competed for the first place in my list of favourites, along with Paalada Pradhaman and Parippu Pradhaman, though I was never fortunate to taste it one more time. Another thing that stuck with me was the grace on that mother’s face…… a beautiful woman,fair complexioned with black curly locks of hair and a small red dot on her forehead ! And then there is her daughter, my firend, Anj - a chubby bubbly girl who was/is in love with music with a serious crush on the singer, Unnikrishnan those days…..and we used every opportunity to tease her :)
Often times when CJJ and I refresh our college days and exchange stories of the bygone era, I always notice a recurring phenomenon in my thought process and that is, Anj’s mom’s Aval Payasam and one more episode often gets pulled back into my active memory shelf and each time whenever I mention that episode , I see CJJ chuckling and that’s something precious as he is someone who believes that I crack jokes only once a year and he keeps count on any addition of my yearly quota!!!
Well, the only thing I remember about that episode is a close friend of ours telling me, trying to control her laughter badly, “ you know what….our Anj got into an empty bus last evening and she tried to get the best seat and finally ended up standing till her stop !! “ Whenever I try to visualise that episode , I always burst into laughter and after more than a decade, I happened to get back in touch with Anj through one of the social networking sites and on one of the mails, I forced to narrate the story in her own words and here’s an an excerpt from the mail:
“……Ah..ha S…….i still remember the day as if it were yesterday..am surprised u have forgotten….anyways…”I was the hapless victim”..so maybe that’s why I remember it more..that day we already had gone to ann’s during the lunch break..we waited in those ann’s steps for 1 hour but we didn’t get our fav’rite chocolate donuts so we(me, A and S) went back again in the evening and bought donuts from ann’s …A bought those cream puffs..which we both never liked..was tooooooooo creamy…anyway..i remember this because my hands were full…donuts plus all those M&B’s from library which I used to read like mad(esp.during Sr. B’s class…)…..when we finally reached the bus stop we were so tired we allowed atleast 5-6 buses to pass..for an empty bus..and then came our “eagle” :) :)….I was the first one to get inside the bus…I sat on one seat..then decided that was not good enough(cos it was just opp the driver.).then I got up and went to another seat..that one was the aisle seat..and I wanted a window one…I got up…and went to another seat..but somebody pushed me aside..so tried another one..again was pushed by someone..finally…I was the only one standing in the bus..everyone else got a seat x-cept me…by that time all were laughing their heads off…that was o.k…but there was this one lady who kept looking at me ..and then laughing..so hard ..she was actually crying.. and that too at regular intervals..till we reached the stop….i swear even the bus driver and’ killi’ were laughing at me…I never got inside that “eagle” bus again…and I doubt whether I’ll ever tell this story to my daughter…but u know what..those donuts got crushed…:( :(.. “
:)
A week back, I was watching TV and they were airing Seinfeld’s Subway episode and to me , the scene where Kramer travels in train seemed to be the sitcom representation of this episode I was referring to . Watch the scene HERE.
Anyway, on my request Anj gave me the recipe for Aval Payasam too.This is what she mailed me:”…. Hey! Here’s the recipe u asked “ For 1/2 a litre of milk….take 1 big handful of brown aval(not white)…amma said “oru valliya pidi “aval…wash and drain the aval(this process should be really fast..aval should not be soaking wet).Now fry this in about 1 tbsp of ghee…till u get a nice smell…add this to the boiled milk…add about 1 –heaped glass of sugar (our typical steel glass)..and continue cooking in a nice thick uruli till the payasam gets condensed and becomes a rich pink colour…u have to keep stirring in between,…this payasam does not reqire any garnishings like cashew,kismis or elakka..in fact that spoils the taste..it should just have that “vattiya” taste,,and the taste of the brown aval…”
Here’s how I translated her mother’s instructions into cup and spoon measurements :
Ingredients: - ½ cup brown rice flakes/Aval (chemba aval)/beaten rice
- 1 tbsp ghee/clarified butter
- 2 1/3 cup milk
- ½ cup sugar or to taste
Directions: - In a thick bottom vessel or Uruli, a wide mouthed bell metal vessel, heat milk and bring to a boil.
- While milk is heating up, give brown rice flakes/Aval a quick rinse in cold water and dry immediately with a kitchen napkin. Heat ghee/clarified butter in a shallow pan, and fry brown rice flakes/Aval for a minute, till ghee is coated well and a nice aroma comes.
- When milk comes to a boil, add the ghee-fried brown rice flakes/Aval and stir well in medium heat. Now, add sugar and stir well until it dissolves into the milk. At this stage, reduce heat and let it simmer for a while, about 20-30 minutes, until it thickens to the consistency of a Payasam.
Verdict: This serves two adults but if you have a spouse like mine - who does not miss any single opportunity to dissuade me from making payasam, relished major portion of it and left some, may be less than a quarter portion, feeling guilty that he should not do such a thing to me - it is better to increase the proportions and this happened not just once, but twice. I guess that says how divine tasting it is .
Now that I used the word divine tasting , let me share one more line from my friend’s mail, “…a speciality ‘nevidhyam’ for sree Krishna…amma usually makes this payasam for sree Krishna jayanthi..for the little Krishna…according to the hindu mythology is a big fan of both aval and paal payasam and with this dish he gets the best of both!!!!”
I know this has been a really long post for a simple recipe but as I started pouring my thoughts on the same, I lost sense of the length of the post……
Related Posts:  
Luv Shn
|
No part of the content ( articles, photographs, recipes) of this blog may be reproduced without my written permission.Copyright © 2007-2010 Kitchenmishmash.blogspot.com. All rights reserved.
|
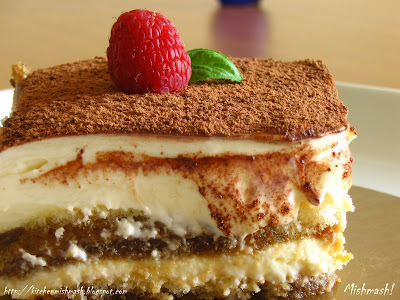
 I was only a 10 year old and yet I had a crush……my very first crush…..a childhood crush on the gorgeous Caramel Pudding! We had a rock solid relationship but my folks found out about us at a very early stage and from then onwards, we were allowed to meet occasionally strictly in their presence. Even when this decadent dessert made its way into the fridge, I was not allowed to indulge myself in perfectly sinful pleasures at my own discretion and when I did, it was always rationed or a ‘charity’ from the elders. But the little brat in me was so desperate that I resorted to some forbidden indulgence………I waited patiently till my grandmother and aunt went for their afternoon siesta…….I walked on tip toes passing aunt’s room and then grand-mother’s bedroom, sneaked a look to see if grandma’s eyes were closed and mouth was wide opened, an indication that she was into deep sleep………then I peeped into the work area to make sure that maid had left the house, targeting the corner shop at the end of the road for her daily dose of gossip…….and then I let myself to open the door of heaven…..the door of that Godrej fridge, painted in sky blue shade and took a spoonful of that luscious, melt-in-the-mouth pudding, chilled perfectly and tasting sinfully delicious……..that was my door to heaven and the heaven kept sending me invites frequently until my grandma woke up hearing the ‘Baankuvili’ (Call for prayer) around 3 or 4 in the evening from the nearby juma masjid!
Over the years the relationship has strengthened and I still feel that electricity whenever I am served a plate of this decadent dessert swimming in a pool of caramel sauce. The child in me still forces me to get a spoon, open the doors of heaven and take a scoop from the dessert plate….it continues to be my favourite dessert, my ticket to heaven :)Caramel Pudding, a dessert quite popular among Kerala homes, is a classic example of the culinary legacy left behind by the European settlers. With the use of simple ingredients and simple techniques, this European classic has been a regular in most homes and back home, this pudding is steam cooked in a pressure cooker. Though we lost my aunt’s exact recipe for Caramel Pudding, I have been on the look out for finding that perfect recipe which comes close to the taste of that forbidden indulgence. The one featured here is something I have perfected over the period of time, based on a recipe my mother found on some cooking show. I played with the ingredients many times to get a perfectly balanced pudding, without the overwhelming taste of egg. My experiment with pressure cooker steaming has not been all that successful and hence I fake the bain-marie method by placing the custard bowls in hot water bath, in a large tray, and there-by creating steams to do the cooking in oven.
Ingredients:
For Caramel Sauce:
For Custard:
- 350 ml milk (little less than 2 cups), boiled and cooled
- 2 small eggs
- 6 tbsp sugar
- ½ tsp pure vanilla extract
Directions:
- Preheat oven to 350F.
- Prepare caramel in a small shallow pan, by heating and melting sugar along with 2 tsp water, until they turn golden or dark brown, depending on your personal taste. (Note: The taste of caramel sauce is highly dependent on its colour. The darker the shade, stronger the taste with a mild bunt flavor.) Keep swirling the pan but do not stir. When sugar is completely melted and bubbles start coming up and if it has reached the colour you want, turn off the stove. Pour this immediately into 4-5 small oven safe dessert bowls or ramekins. (Note: You should work quickly here as caramel hardens fast when removed from heat). Swirl dessert bowls or ramekins quickly to coat the bottom of the bowls evenly with caramel and keep aside until it sets well.
- Prepare Custard: While caramel is setting, beat eggs and sugar well with a hand mixer for a minute until sugar is completely blended with eggs. To this add milk and vanilla extract and beat for another 30 seconds.
- When caramel is fully set (usually takes about only 3-4 minutes), pour the custard mixture evenly on the prepared dessert bowls or ramekins.
- Prepare a hot water bath to place the prepared dessert bowls or ramekins, by pouring steaming hot water into a large cake pan or any other oven safe tray and filling it till half. Now place the prepared dessert bowls or ramekins carefully into the hot water tray, cover with aluminum foil and slide into the oven and bake for 50-60 minutes or a knife inserted in the centre come out clean; the texture of pudding should be wiggly at this stage. (Note: You may keep the prepared dessert bowls or ramekins first and then pour hot water till half the height of the bowl or vice versa.) Baking time differs depending on the oven setting. You may start checking anywhere from 45 minutes into baking and if the knife inserted comes out clean, you can carefully remove the hot water tray, and leave the tray on a wire rack, on the kitchen counter and let it cool down. When dessert bowls/ramekins are warm enough to touch, remove from the water bath and leave on the kitchen counter till it is completely cool. Wrap each bowl with a clear plastic sheet and refrigerate for 4-8 hours.
- For serving: You need to unmould the pudding into a serving plate, for which run a knife in full circle by the inner side of the bowl (between pudding and dessert bowl edge), cutting through the pudding and the solid caramel base at the bottom. Then place the serving plate on top of the bowl and carefully invert/turn the over and gently lift the bowl and you will get your pudding swimming in a tasty sauce of caramel. (Note: If you have a doubt that pudding may not come out of the bowl easily, either pat on the bowl after inverting or keep the bowl in hot water for few seconds before inverting)
Related Posts:
Luv
Shn
|
No part of the content ( articles, photographs, recipes) of this blog may be reproduced without my written permission.Copyright © 2007-2010 Kitchenmishmash.blogspot.com. All rights reserved.
|
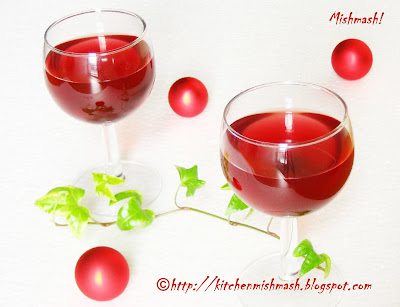
  ‘Tis the season…..of high festive spirits and to be merry……..that time of the year when I long to be part of my family and friends……that time of the year when I yearn to get drenched in the holidays spirits of the land where I grew up………the sights, the sound and the smell of those familiar streets of childhood and adolescence came flashing intermittently like comforting bout of hiccups…..and so did the thought of those traditional Christmas goodies from my homeland…….the tray of goodies Pauly aunty gifted every year to my grandma , lined with Achappam/Rose cookies, Kuzhalappam/Crisy Rice curls, Diamond cuts, Vattayappam/Steamed cakes, Plum Cake and those melt-in the mouth-puddings …….. the thought of getting this year’s X’mas treats ready for our friends took me back to those wonderful days……Of the many fondest memories associated with the taste, sound and smell of my grandmother's kitchen, there is this beautiful image that always floats on top of my sea of memories......a picture of my mother and aunt sitting on the floor and kneading some dough and then rolling out on a small high table- chopping board and cutting them into diamond shapes......Pauly aunty’s daughter was also there to help them with some tips……the air around them was one of gaiety and happiness…….Like a sponge absorbing water, I sat there soaking in the spirits of cheerfulness and laughter with a tinge of curiosity in my eyes……and on the other end, my grandma fried those diamond cuts and drained ‘em on a palm tray, Muram, lined with paper and then rolled them in sugar syrup ... I vividly remember running to my grandma's dining room every now and then and opening her built-in-cupboard in search of those fried goodies......they were irresistible; till then I had never tasted something like that and I just couldn’t control myself from nibbling them...As much I have adapted myself to the holiday spirits and tasty traditions of my temporarily adopted foster home, the more I stay away from my homeland, the more the yearning to go back to my roots and the desire to recreate the tastes of home. So this year as I heated the oven to bake cakes and cookies, I turned on the stove to fry up some crispy treats part of the Christmas traditions of Kerala. I made those diamond cuts, fried dough shaped into small diamonds, infused with the fragrance of cardamom and drenched with sweetness of sugar syrup. At my paternal home, according to my cousin, this snack is called as "Vettipori" or just "cuts".
Ingredients for Diamond Cuts:
- 2 cups All-purpose flour/Maida,sifted
- 2 1/2 tbsp beaten egg
- A generous pinch of salt
- Water to knead the dough (Little more than 1/2 cup)
- Seeds from 2 cardamoms, crushed
- Oil for deep frying
Sugar Syrup *
- ½ cup sugar
- 2 tsp water
- Seeds of 1 cardamom crushed
Directions:
- Mix all purpose flour, egg and salt; add water in small quantities and knead well until you get soft dough with smooth even surface. When the dough is almost coming together, sprinkle crushed cardamom. Once the dough is ready, cover it with a damp cloth and leave it on the kitchen counter for 15 minutes.
- Divide the dough into 4-5 balls and take one for rolling and let others remain under the damp cloth. Roll out the dough into thin rounds. Run your knife diagonally from left first and then cut diagonally from right , on the rolled out dough, to create diamond cuts/shapes.
- Heat oil and in low-medium heat, deep fry till the diamonds puffs up and edges begin to turn golden; remove and strain it on a paper towel.
- For making sugar syrup, heat sugar and water and let it boil and thicken to a consistency that will help coat the fried diamond cuts. You may drop some syrup on an aluminum sheet to see if it hardens. Keep swirling the pan occasionally while making syrup and you should not let the sugar syrup crystallize; just before coating the fried cuts, add the crushed cardamom to the syrup and coat the diamond cuts thoroughly in the syrup and then let them dry on a cookie sheet, lined with aluminum foil.
Note:* The quantity suggested for making syrup is only for a small batch of fried cuts. It is better to handle in small quantities as getting the right consistency of sugar syrup is a tricky affair, especially if you don’t have prior experience. I had to make a couple batches to get the right consistency and I still haven't mastered the art.

The alternative method for coating the diamond cuts with sugar syrup is to dust the fried cuts with confectioner’s sugar, infused with powdered cardamom. But let me state it clearly that dusting confectioner’s sugar is not an ideal substitute for coating with syrup as there is a world of difference in taste .
I’m sending a batch of this to Italian cookie lady, Susan who is releasing her II Season of EAT CHRISTMAS COOKIES.
Related Posts:
Luv
Shn
|
No part of the content ( articles, photographs, recipes) of this blog may be reproduced without my written permission.Copyright © 2007-2010 Kitchenmishmash.blogspot.com. All rights reserved.
|
A chat between Child Ego and Adult Ego of yours truly.Child Ego: I want chocolate pudding Adult Ego: No, you shouldn’t! It is full of fat….you should stay away from it and eat healthyChild Ego: No, it is good for bones!Adult ego: What?? Who said so?Child Ego: Susan said so!Adult Ego: Susan? Who?Child Ego: Susan of Food Blogga!Adult Ego: What did she say?Child Ego: She asked to eat chocolate pudding to get enough calcium for bones!!Adult Ego: Really?Child Ego: She also said that building strong bones early in life helps prevent osteoporosis later in life…..she eats chocolate pudding to get calcium….she is quite wise.Adult Ego: hmm…interesting!Child Ego: I want chocolate pudding….I want chocolate pudding…..Adult Ego: well……let’s make then!!!Adult Ego heads to kitchen and Child Ego sits there happily thinking of the silky and creamy chocolate pudding :)Double Chocolate Pudding Parfait(Recipe Source: Gourmet Magazine, 2008)Ingredients:- 2 tbsp cornstarch
- ¼ cup + 2tbsp sugar, divided
- ¼ cup + 1tbsp unsweetend cocoa powder, divided
- 2 cup whole milk
- 4oz fine quality semisweet chocolate, finely chopped
- 1tbsp unsalted butter
- 1 cup chilled heavy cream
- ¼ tsp vanilla extract
- A pinch of salt
Directions:- Mix together cornstarch, ¼ cup sugar, ¼ cup cocoa powder and a pinch of salt in a saucepan, then gradually whisk in milk. Bring to a boil, whisking until thickened, about 3 minutes. Remove from heat and whisk in chopped chocolate and butter until melted. Transfer pudding to a bowl and give a quick chill by setting in an in ice bath and stirring occasionally, about 10 minutes.
- Meanwhile, beat cream with vanilla and remaining 2tbsp sugar and 1 tbsp cocoa powder until it holds stiff peaks.
- Layer pudding followed by cream, into serving bowls. You may repeat the layers. Chill for one hour and dust it with some cocoa powder before serving.
Verdict: Both adult ego and child ego gave a thumbs up after enjoying the pudding parfait. The silkiness of the choclate pudding complemented quite well with the creaminess of whipped cream. Easy to put together and dangerously addictive.Enjoy the long weekend !LuvShn
|
No part of the content ( articles, photographs, recipes) of this blog may be reproduced without my written permission.Copyright © 2007-2010 Kitchenmishmash.blogspot.com. All rights reserved.
|
This post is part of SADYA VIBHAVANGAL – Learn to make the traditional Kerala Feast- An Artist’s Edible Palette ! Childhood weirdness…..hmm…..interesting topic, huh? I had my big share too…….. :) Anyone interested in knowing a deep dark secret of yours truly?? Well…. I never used to drink Payasam cooked in jaggery….anything in dark or brown color was “karutha Payasam“ to me and as a 6 or 7 year old, I always believed that drinking “karutha Payasam” (Karutha means black) will turn me into someone with a dark colored skin!!!!!!! I don’t know who seeded this brilliant idea in my mind…….it sure took sometime for me to develop a taste for Payasam cooked in jaggery. But dark or white, Payasam is a heavenly dessert and Keralites can boast of various delicacies like Palada Pradhaman, Praippu Pradhaman, Chakka Pradhaman, Pazha Pradhaman, Paal Payasam, Gothambu Payasam, Semiya Payasam and the list goes on……. Semiya Payasam is the easiest and less time consuming one and for the same reason, it is widely served in most of the Sadyas, especially for the ones made at home for small gatherings. Payasams taste best when they are cooked in “uruli”, a wide-mouthed bell metal vessel, as shown in the picture.
Ingredients: - (Approx.)- ½ cup roasted semiya/vermicelli
- 3 cups milk
- ¼ cup + 2tbsp sugar or To taste
- 1tbsp ghee
- 12-15 golden raisins
- 10 cashew nuts
- 2-3 whole cardamom pods
- 1/8 cup sweetened condensed milk (Optional)
Directions:
- Boil milk in a saucepan and when it is fully boiling, add the roasted semiya/vermicelli slowly and keep stirring until it is evenly spread and floating individually in milk. Bring this to a boil and then add the sugar. Stir well to combine the sugar with the milk and semiya and again bring to a boil. Now reduce the heat and let it simmer in low flame until it starts to thicken. Add the condensed milk and stir for 4-5 minutes and when it reaches the required consistency, turn off the stove.
- Crush cardamom pods and pound the seeds and add this to Payasam when it is still hot.
- In a small shallow pan, heat ghee and fry golden raisins, until they begin to look like plump golden grapes; also fry the cashew nuts till they turn golden colour. Add this to payasam, when it is still hot. Serve warm or chilled.
Note: Using condensed milk is optional. If you avoid condensed milk, adjust sugar and milk accordingly. The above proportion of semiya and milk give ideal consistency if you serve it warm. Semiya Payasam usually tends to thicken when it comes to room temperature or chilled inside the refrigerator. Normally I add some more hot milk to the Payasam , boil it again and also adjust the sweetness by adding more sugar. Also, number of cashew nuts and raisins to be added is purely a personal choice. If you re not using roasted semiya, break the long threads of semiya/vermicelli into ½ inch pieces and roast in a tbsp of ghee and then add it to the boiling milk. You can skip one step if you opt for roasted semiya.
Check out the recipe for Parippu Payasam/Pradhaman .LuvShn
|
No part of the content ( articles, photographs, recipes) of this blog may be reproduced without my written permission.Copyright © 2007-2010 Kitchenmishmash.blogspot.com. All rights reserved.
|
 Been enjoying this finger food for a long time now….but never knew the right name……never bothered to find out as well! N , a very good friend of mine and her mother introduced me to this combo during one of the group-study sessions at her place…..three of us got together to study statistics and economics, two boring and tough subjects for me and if you ask me to refresh my memory of that particular day, I don’t even remember what we studied……not even the topic of the study but all I can think of is the yummy spread her mother prepared for us……… and the Karimeen Varuthathu/Fried Pearl spot, prepared just for me when aunty found out that it was one of my favourites………a gesture that touched me a lot…….and then this deadly combo…..dont know how many I had that day……whenever I made this , it was a great hit with everyone……so thought of sharing it with you all….but when I sat down to make this post, I was not able to think of a fancy name for it…….sort of in a brain freeze as too many things are happening at my end……we re in the middle of a relocation………shifting to a new place and home here in US itself……I will be traveling for the next two weeks and once we find an apartment and settle at the new place, I hope to resume blogging…till then I will be on a short break………….with so many drafted recipes and photographs in the dashboard, I wont be gone for a long time….so trust me, I will be back soon :). Since all I can think of is how to transport my ‘curry-chatti’ and terracotta decors in one shape and plants alive, I leave the challenge to you friends, to find an apt name for this trio :)
Well, coming to this delicacy in picture, it is a deadly combination of small bite size pineapple chunks, cream cheese and glace cherries on a toothpick/skewer. This can be served as a pre-appetizer or a quick and simple dessert; pairs well with champagnes and wines too which means it is great for cocktail parties too. I am not sure about the availability of cream cheese back home in India but I am certain that Amul cheese squares works well with this as I used to buy that for preparing this one.
Try this and name the trio too :)
Hope to be back soon…..till then you take care and eat well :D
Luv
Shn
|
No part of the content ( articles, photographs, recipes) of this blog may be reproduced without my written permission.Copyright © 2007-2010 Kitchenmishmash.blogspot.com. All rights reserved.
|
 Background of the story: A newly married couple commences their much dreamed about life together in Chennai. Bride’s cooking experience starts with two cups of tea and ends with an omelet. With some simple recipes scribbled in a 100 page notebook and lots of beginner‘s luck in the kitchen, she succeeds in whipping up some everyday recipes. Everything is rosy and pink.***
Location: A small town in KeralaScene: The young couple comes down to Kerala, after celebrating one month anniversary of a beautiful marriage, to visit girl’s parents and during their short stay there, they get an invite for dinner and stay-over at girl’s aunt’s place. Since our girl being the eldest in her maternal family, her aunt prepares a grand feast to receive the bridegroom, starting from drinks and pre-appetizers and a full course menu for the dinner. ….everyone in a happy mood, lots of laughter and teasing going around…….and when everybody is relaxing after a heavy dinner, our aunt enters the scene with a tray of pudding, tempting everyone with its eye candy look…..everyone starts relishing this sweet delicacy and suddenly our hero, bridegroom drops the bomb and asks the girl, “hey…I loved this dessert….absolutely tasty….why don’t you ask your aunt for the recipe?”” Girl, though shell-shocked at this unexpected move from her husband, tries to hide her nervousness and nods her head in agreement and goes to bed with a wishful thinking that husband might forget the whole thing and she can return to her routine cooking after reaching Chennai. The next day morning, while bidding farewell to the relatives, boy asks the girl again, “So, did you get the recipe?” and the girl halfheartedly says, “aunty will mail me by post….” !!Location: ChennaiScene: Newly married couple returns to Chennai and after a week or two, our girl receives a letter from her aunt, with neatly written guidelines for the pudding and seeing her husband’s excitements, she decides to give it a try. So, one day after getting back home from work, she rolls ups the sleeves and knots the apron and starts the work.STD call after 10 minutes :Girl: Aunty, this thing is not thickening, how long should I stir this?Aunt: hmm….only for 4-5 mts after adding the condensed milk.Telecon ends…. Second STD call after 10 mts:Girl: …..sugar has melted now…it is golden colour now, shall I add the nuts?Aunty:….burn the sugar till it is golden brown and then you add the nuts.Telecon ends….. Third STD call after 10 mts:Girl: Caramelized nuts are stuck …I am not able to scrape it offAunt: Where did you pour it?Girs : On a newspaperAunt: : Eh!!!!! You should have used butter paper…anyway try to scrape off after breaking them into small chunksTelecon Ends….. Fourth STD call after 30 mts and uncle picks up the phone:Uncle: Aahhh…….Heard you re making the pudding..so is it done?Girl: mm…I guess this is my first and last time with that pudding….aunty is there?Aunt: Is it ready now?Girl: I am not able to spread the jam …jam is quite thickAunt: oh…slightly smash the jam with the back of a spoon and then spread….Girl: Why didn’t you tell me earlier that it takes lots of time…? I am done with this and if it doesn’t turn out well, I am throwing it out!!Aunt: It is such a simple and easy recipe…..I don’t understand why you re having so much trouble!Girl, quite bugged and impatient at this stage, keeps the phone down, finishes the topping and throws the whole tray into the fridge and wraps up the kitchen. When husband returns from work, they have their dinner together, exchanging the day’s happenings and after some time, girl serves ‘the pudding”. Husband takes the first scoop …..tension builds up…..he smiles and takes another spoonful and tells,” WOW! I am glad you tried this…..now we will make this often…wont you?”. The moment that made the whole thing worth and gratifying at the same time!! :)**THE END**
And I should say, aunt was right then, this is an easy and simple dessert that you can whip up in less than 20-30 minutes, especially if a beginner has clear instructions and I realized that after all these years and it is surprising that this China-grass/Agar-Agar pudding is still one of the toppers in CJJ’s favourite list. China Grass, also known as Agar-Agar is a seaweed derivative and a ‘vegetable gelatin’. Because of its gelatinous nature, it is used as a quick setting base for many desserts and it is flavorless in nature and will get set in room temperature as well. The base pudding in this recipe is quite versatile with any other flavorings as well as topping too. Using canned pineapple chunks or any other fruits in sugar syrup is also a great idea to whip up this easy yet tasty pudding in less than 20 minutes. China Grass is available in Asian stores in US.The right consistency for this pudding is when the base pudding holds together, something like the Jello and at the same time, it is not too thick or hard. Ingredients:For the base: - ½ litre milk (around 2 1/8 cups)
- 1 can (14oz) sweetened condensed milk
- 5 tbsp sugar
- 2 tsp china grass powder or (Approx.)10gms china grass strands*
For the topping:- 3 tbsp jam of your choice
- 3 tbsp sugar
- 2 tbsp cashew nuts or almonds
Directions:- Prepare the base of the pudding by boiling milk in a saucepan and when it comes to boil, reduce the heat and add sugar and china grass powder; keep stirring continuously, until everything is dissolved well. Now, add sweetened condensed milk, in low flame and stir continuously for 3-4 minutes and switch off the stove. Using a strainer, pour this mixture to an 8 inch pan and let it set in the room temperature, till it is cold and then chill in the refrigerator for 1-2 hours. (Note: If you are using china grass strands soak them in hot water or prepare it as per the package instructions)
- Prepare the praline topping by heating and melting sugar until they turn medium brown. Keep swirling the pan but do not stir. When sugar is completely melted and bubbles start coming up, turn off the stove and add the dry toasted nuts to it, and pour them onto to a non-stick aluminum foil or a lightly oil coated aluminum foil sheet, placed on a cookie sheet and let it set. When completely dry, crush the caramel coated nut sheet using a rolling pin and then powder them in a food processor or in the smallest jar of a mixer/blender. (Note: Hot caramel can create serious burns, so make sure that you play safe and kids are not around while preparing it. While pouring the caramel coated nuts, make sure that a thick layer is not created.)
- Once the base is set, take it out of the refrigerator and spread thoroughly mashed jam on top of the base and sprinkle powdered praline and chill it for another 30-40 minutes. Slice and serve.
This goes to Pooja’s Valentines Day Special Event and Zorra's "Heart for your Valentine"
Check out other Valentinyyy treats from this blog by clicking on the image to view the recipe.
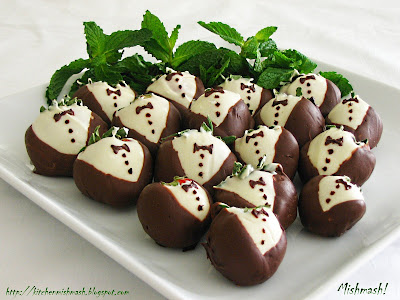    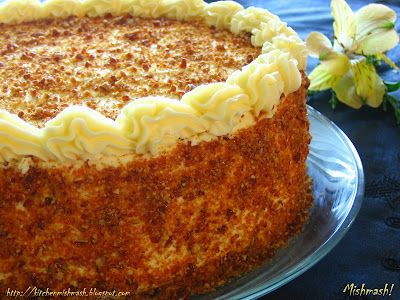
UPDATED on 13th Feb* : There was a typo in the measurement of China grass when I first posted the recipe, I have corrected it now. Sorry for the mistake! I have noticed that there is lots of variation in the measurement of china grass we get back home in India and here in US. The measurements I have given above is as per the products we get here in US. Just like the quality of dry yeast differs in India and US, the quality and strength of china grass also differ. So the safest method is to first try diluting it in warm water and see if you re getting the right pudding consistency and then make variations while working with milk.
Luv
Shn
|
No part of the content ( articles, photographs, recipes) of this blog may be reproduced without my written permission.Copyright © 2007-2010 Kitchenmishmash.blogspot.com. All rights reserved.
|
Over an year ago, I was chatting online with my very close friend LJ and as the habit goes we got into a philosophical mood contemplating on things which we have no control over or discussing about dreams and future ventures or pondering over things which we did not pursue and that day also we chewed over many such aspects and somewhere she reminded me of that story of the rich man and his party around the crocodile pool. Am sure most of you have heard this story where the rich man throws a party at his house around a crocodile pool and somewhere in the middle of the party, he poses a challenge to his invitees asking them to swim across the crocodile pool, to receive a great offer. As everyone stands there astounded, someone jumps into the pool, swims through the pool, wrestling with those crocodiles around and reached the other side and everyone crowds him and asks “How did you do it?” and the guy answers,” Someone pushed me in !!!!! “ Almost after two weeks or so, after this chat with LJ, I saw myself in a similar pool but unlike the guy in the story, I knew who pushed me into it, none other than my CJJ who created a BlogSpot for me, when he saw me glued to the monitor, admiring all those food bloggers out there and the creative element embossed in the whole thing and not trying out or cooking any recipes from there. I was not at all confident and had my own doubts about maintaining such a place, especially with my track record of not sticking to any hobby for more than a month or so. But now when I look back, I think that was a very clever move from CJJ’s side, as I saw myself trying more recipes and delicacies and also diverting my creative energy into a humble place like this. But the pool I was pushed into was one of very talented and creative group of bloggers in general, instead of crocodiles :D I went through the initial phase of infatuation, then the obsession, honeymoon period and occasional short breaks and here I am, for the first time in my life, still continuing a hobby I was pushed into a year back!!!! My very first post, written exactly an year ago, was concluded like this:” I don’t know how far I will be able to sustain this new found interest in blogging but as long as I have a bulldozer behind me, yes my CJJ, I will be sharing some of my experiments from the kitchen...and I start my first one here, raising a toast to my parents, my CJJ and to all of you, my friends !! “ CJJ is still the bulldozer, my technical and photography support, and my family, including the one I married into, have been giving me all the support and help they can and my mother being the main contributor and tip provider of most of my recipes, and my great critic as well; but let me tell you, if I have kept this place for one year, all that credit goes to this gracious and wonderful blogging community around me and each of my readers, who gave me continuous encouragement and showered words of appreciation and lovely feedbacks. I am 101% certain that I would have wrapped up this place long back , had YOU not come back to me with that feedback and support. It has been a great year, knowing a wonderful community, making a handful of good friends, exploring my interests, polishing my skills, learning about various cuisines and last but not the least, bringing variety to our dining table thanks to all those talented bloggers out there! When food bloggers tickled my palette, my non-food blogger friends made me laugh with their wit and humour. Some of you inspired me …some helped me relax. I may not have seen your faces or listened to your voices, but some out there are very close to my heart and I feel a nice rapport with many of you through the little notes and chats we share through the comment section. Let me admit, there were times I wished some of you were staying close to me in the same town!!!!I have learnt a lot in the last one year and also I would like to thank all those who have come here, read my stories, shared your stories, appreciated me , gave constructive feedback and moreover, tried the recipes from my humble blog and left feedback here. And for all those anonymous readers and those who gave search for “mishmash beef stew ..mishmash fruit cake…mishmash wedding cookies……mishmash chicken roast…..” , and tried out these recipes, “THANK YOU” :) Let me wrap up this anniversary post the traditional Kerala style, with a traditional dessert :) Parippu Pradhaman/Payasam is a traditional sweet lentil pudding, served as part of sadya, a grand feast, a vegetarian meal served on a banana leaf, as part of any auspicious occasions like marriage, child-birth, birthday celebrations, house-warming ceremonies or marking any happy occasions in Kerala. This is one of my favourite traditional desserts and at my father’s place, it was prepared in a big Uruli, a wide mouthed bell metal vessel (shown in the pictures) and I remember my aunts stirring it with a Chattukam, a heavy brass spatula and this process is called ”Payasam Verakal/varattal”. The thought of crushing Pappadam (Indian wafers) squishing ripe bananas onto the Pradhaman/payasam served on a banana leaf itself is enough to make my mouth water to sail a ship ! To view a picture of traditional sadya, click here and read more here.
Ingredients for Parippu Pradhaman/Payasam OR Sweet lentil Pudding:
- ½ cup Cherupayar parippu/split Moong dal/ dried yellow split dal of green gram
- 1 ½ cups water
- 1 cup melted and filtered black/brown Sharkkara/jaggery, medium-thick consistency
- 1 cup thin coconut milk/Monnaampaal
- ½ cup semi-thick coconut milk/Randaampaal
- ½ cup thick coconut milk/Thanipaal
- 1tbsp ghee + 1 ½ tbsp ghee
- A handful of cashew nuts
- A handful of thin & small coconut slices/Thangakothu
- 3 whole cardamoms crushed
- A small pinch of salt
Directions:
- Heat a pressure cooker and dry roast the Cherupayar parippu/Moong dal/dried yellow split dal, till it is hot to touch and add 1 ½ cups of water and cook till it is soft. (Note: You may use your convenient method to cook dal)
- Once the steam and the sizzling sound goes off, open the cooker and mash the dal with the back of a spoon, to the consistency of a baby food.
- Heat a big saucepan/Kadai or Uruli; add the mashed dal and the melted and filtered sharkkara/jaggery together, with a small pinch of salt, in low heat, till it turns into a thick and almost dry consistency. You need to keep stirring to avoid this mixture sticking to the bottom of the pan. When it reaches the required consistency, add a tablespoon of ghee and blend everything together and turn off the stove. (Note: At this stage , once it cools down and comes to room temperature, you can refrigerate the whole thing for a long time, even up to an year; but please keep in mind that its refrigeration life depends on how well you have “varatti/veraki”- the dal, meaning how well you have made the dal+jaggery mixture into a thick and almost dry consistency)
- At this stage, add a cup of thin coconut milk/Monnaampaal, stir well and then let it boil, in low heat. When it is boiling add the ½ cup semi-thick coconut milk/Randaampaal and bring it to a boil and when it is boiling fully, pour the ½ cup thick coconut milk/Thanipaal and again bring it to a boil; add the crushed cardamoms , stir well and then switch off the stove.
- In another small pan, heat 1½ tbsp ghee and fry some broken cashews and keep aside; fry some small coconut slices/Thangakothu, till its turns golden brown in colour and pour everything, both the broken cashews and coconut slices, including the leftover ghee to the Payasam/Pradhaman and serve warm after 30 minutes.
Note: Parippu Pradhaman/Payasam has a general tendency to thicken once it rests for sometime and hence, even-though the Pradhaman/Payasam may look more liquid-y at the end of the preparation, the 30 minutes resting window is enough to get its semi-thick consistency. Also note that the taste of the Pradhaman/Payasam is purely dependent on the Sharkkara/jaggery – coconut milk proportion and hence go generous on the latter but use jaggery according to your sweet tolerance. Coconut milk is a significant ingredient in enhancing the taste. The above measurement is as per our family’s taste preferences; feel free to adjust the proportions. This tastes better if you are using freshly squeezed coconut milk but canned coconut milk, diluted with water, is also good. Also, I used canned coconut milk and hence those who are using freshly extracted coconut-milk, should be going for more quantity as the consistency differs; hence make changes accordingly as coconut-milk is the taste enhancer here. Adjust the number of crushed cardamoms based on its strength. Some home grown ones are quite strong. As I noted earlier, you can stop at the third stage and refrigerate it for a long time and complete the 4th & 5th steps when it is needed. Again the colour of the payasam is dependent on the colour of the sharkkara/jaggery you use; so make sure that it has that rich dark brown colour.

I wish this post was more than a virtual one to share a cup of Parippu Pradhaman/Payasam with you all !
This goes to RCI-Kerala, hosted at Currybazaar and Susan’s My Legume Love affair.
I know this was a mile long post, but those who know me got it right, “yeah….I cant help it!” :)
UPDATE: For Sadya recipes check out SADYA VIBHAVANGAL - Learn to make the traditional Kerala Feast- An Artist’s Edible Palette !
Luv
Shn
|
No part of the content ( articles, photographs, recipes) of this blog may be reproduced without my written permission.Copyright © 2007-2010 Kitchenmishmash.blogspot.com. All rights reserved.
|
|
|
|
|


 All text and Photographs are copyright protected.
Copyright © 2007-2010
Kitchenmishmash.blogspot.com. All rights reserved.