|
|
A guest post by Soja Suresh, from the Readers Corner...

I might be repeating myself but I can’t help emphasising this point that it is always the people behind food and the taste memories associated with the same that gives most dishes a character and uniqueness of its own. As we try to replicate those dishes, either to savour a comforting memory or to connect to one’s roots, whatever be the drive, the whole experience of recreating those flavours and taste is deeper and meaningful, especially when you cook such dishes for people very close to your heart and such recipes get a substance of its own.
Here is one such example shared by my reader, Soja Suresh who has been trying to perfect her skills in recreating a traditional special from her mother-in-law’s kitchen and to be on par with her husband’s taste memories. According to her, Uzhunnappam is a very popular palaharam/snack in her husband’s place Kodanadu, a picturesque place in central Kerala. This can be described as a roasted flat bread, traditionally made in an Uruli, a wide bell metal vessel over burning embers and she also mentions that there are some people who put coal on top of the lid as well which sort of creates an atmosphere of baking. Read on : 
Hello Shn,
I am Soja now residing at Kodanad . a village near Perumbavoor in Ernakulam district. This is my husband’s place. I had made a comment about your kinnathappam and had enquired you about mailing recipe of uzhunnappam which is a traditional food item of this area. So now I’m on that mission. I came to know about this “palaharam” only after reaching this place after marriage. This is a special dish made by my mother in law on special occasions. Everyone here are fans of this appam and also anything made by my mother in law. She is no more ;but we have inherited the methodology of this great dish from her (though each time I try out this thing there would be the same comment from my husband “ammayude pole ayittilla!”) Nowadays comments have become a bit weak ; I think “ente prathikaranam bhayannittakam” or “ammayude pole ayittundakam!” This is usually made in an uruli over kanal aduppu but my co-sister makes it on non stick pan over the gas stove. Since I’m always longing for my husband’s good comments I still make it in uruli.
UZHUNNAPPAM
Ingredients
- 3 cups roasted rice powder(raw rice powdered and roasted)
- 1cup black gram dal(whole uzhunnuparippu)
- ¾ cup grated coconut
- 5 to 6 shallots for grinding
- 2 pinchCumin seeds (jeerakam)
- 2cloves garlic
- 20 to 25 shallots for slicing
- About5 to 6 tablespoons of thinly sliced thengakothu
- 3 stems of curry leaves
- Salt as required
- ½ glass of coconut oil for roasting the appam
Method
Roast the black gram dal in a frying pan (oil not necessary) till red in colour.. Powder it in a grinder.(Otherwise you can soak the fried dal in water and grind to a paste). Grind together the above mentioned ingredients from 3 to 6.Fry the shallots till golden brown . Also fry sliced coconuts, and curry leaves. In a large vessel mix together rice powder, powdered or ground dal, ground coconut paste, fried shallots, thengakothu, curry leaves and salt . Add water to the above mixture to make a batter of the consistency similar to unniappam or thick dosamavu.
Leave the batter to get soaked for 2hrs since we are using roasted rice powder. [ I occasionally use raw rice powder; ie.before roasting.The powder should be coarse{puttupodiyude pakam}. ] When poured it should be thick like unniappam batter. After 2hrs. place the uruli on the kanal aduppu with a small firewood burning in the aduppu. Pour about 2 ladles of coconut oil to the uruli and when it becomes medium hot you have to pour about 3 ladles of the batter to the oil. Spread it in circular shape like that of dosa but should be very thick; about 1cm. thick in the middle and then tapered to 1/2cm along the edges. Now you have to cover this appam with a lid and to leave it for some time on slow fire until it’s inside gets done ; take care not to get it burned. After some time toss it upside down so that the other side also gets done . You can toss it three or four times till it gets done and also both sides must get “moriyanam” a bit. Some people here use red hot charcoal on top of the lid (similar to baking). After it is done it’ll be reddish brown in colour and when it is cool slice it in radial direction from the center .It’ll look like plum cake pieces. Tastes best along with “nadan” chicken curry. Very delicious.
Note:For trial it is better to take coconut oil and batter in small quantities and after practicing to spread the batter and to toss it you can make bigger appams in size. The thing is that if only the appam is bigger in diameter then only you can make it thick and then only will it be tastier. Cooking process is similar to frying a thick egg omelette.
|
Soja gave me a detailed recipe and promptly replied to mails to clear even the silliest doubts of mine. My mother, during her stay here in US , brought Soja’s recipe to life in my kitchen, giving it the smell and taste , sans Uruli and coals. She made this in a non-stick pan and we used split and skinned black grams/Uzhunnuparippu. We enjoyed it with some spicy chicken curry as she suggested. Based on our experience, one thing I can say confidently is that slow cooking is the key here and you need to be cautious with the consistency of the batter too.
Soja, my heartfelt thanks for being so generous in sharing such a local specialty and getting this village beauty its well deserved attention.
Luv Shn
|
No part of the content ( articles, photographs, recipes) of this blog may be reproduced without my written permission.Copyright © 2007-2010 Kitchenmishmash.blogspot.com. All rights reserved.
|

A glance into a mesmerizing temple festival basking in the old world charm of rituals and practices and a simple traditional food that gains a personality of its own because of all the tales and rituals associated with it……
I had one such gem in my mail box early this week from Revathy, who shared with us the recipe for Kannur Style Kalathappam/Kalthappam. Here’s excerpts from a couple of mails she sent me on this topic, clearing my doubts and questions…… ………………………………..
Hi Shn,
Your interest to recreate the good old recipes excites me and another traditional snack came to my mind, which is made part of "Pooram festival "We call it as Ada. Did u know about this? It is somewhat like the Ela ada you have posted but the ingredients to make the ada is different. Rice powder is mixed with melted jaggery and cooked spilt dal, wrapped in jackfruit leaf or Cinnamon leaf or banana leaf and steam cooked .It lasts for a week in cool climate.
Pooram is celebrated a few weeks before Vishu and it is to please the God Kama, God of Love. We make idols of Kama using cow dung or mud and decorate it with seasonal flowers everyday . First, the idol will be kept outside steps of the well. Old homes have wells that has a few steps outside right…. and if no steps, then just outside of the well/Kinar ("Kinnattin Karayil"). Then each day new idols will be made and kept at the courtyard in front of home ….. it is just like we make pookkalam ..only thing is we don’t throw the old ones and places keep changing everyday....and last day we take all of them to the jack fruit tree and keep it under that . It is done with a small procession of every one in the family and neighbors. Last day when take it to the jackfruit tree everybody loudly say something like this.. "neerathum Kaalathum Adutha Kollavum Varanee Kamaa "
Duration of this celebration is 8 days ..That’s till Pooram Nakshtram. And the 8th day we make this Ada.
Now the Recipe
It is a time consuming recipe..
White Rice Flour - 2 cups (Like the one we make for Puttu and roast it very well) Jaggery Melted - As per Sweetness (It shouldn’t be too loose ,So add very little water) Cooked kadala -parippu /Split gram/ Chana Dal - 3/4 cup Cardamom -3-4 Coconut slices -1/2 cup Jack fruit /Cinnamon /Banana leaves -
When the Rice Flour and Jaggery are cool mix both with hands it should be thick like we make dough for Ela Ada, then add Cooked kadala -parippu /Split gram and coconut slices and cardamom powder and mix well with hand. Make small ball ,then place it on top of a Cinnamon or Jackfruit leaf/Banana leaf. Flatten it same like Ela Ada and fold it. There no filling so just fold. Then Steam it .You should steam it around 45 mints in high steam and then keep it in med for 15 mints. And check it is done or steam some more time.
Hope this will be helpful to you.
TC Revs …………………………….
Till I read her first mail on this topic, the word “Pooram” , to me , was synonymous with the famous Thrissur Pooram of Kerala. Yes, it was my ignorance that I was not aware of such a charming festival celebrated among the northern Malabar region of Kerala. The web searches as always were not satisfactory but Revathy’s mails painted a more vivid and colourful picture and specific details of the festival…..and I loved the part where she mentioned that small yet the most interesting tidbit about the final day ceremonies of the festival and how they wrapped up the rituals with that simple prayer, “"neerathum Kaalathum Adutha Kollavum Varanee Kamaa "
I guess the links below throw light into the same festival and the Wikipedia link, talks about “Poovada Chudal” , which I assume , is referring to the same preparation. Please correct me if I am wrong.
I wish someone out there shared some photographs from the Pooram Festival of Kannur!
Revathy’s recipe is perfect and easy to follow and I just halved her recipe to get a sample and since neither jackfruit or cinnamon leaves are available at my part of the world, I had to use banana leaves and I can only imagine the depth of flavour cinnamon leaves would impart while steaming these rice flour parcels , sweetened with jaggery with the nutty taste from cooked split gram , flavored with fragrant cardamom!!
Since dark brown jaggery was out of stock in my kitchen, I have used the light brown variety and hence the colour might be different from the traditional one. Since it was one of those trials without a visual reference, please do forgive me for any mistakes I have made in recreating this dish or any assumptions I have drawn up unknowingly.
I know I would have got more tidbits and tales from Revathy, had I pestered her for more details but knowing that she juggles home, studies and a little wonder, I couldn’t think of taking her much valuable time. I really admire and appreciate Revathy’s efforts for taking time from her tight schedule and checking out all these tales and recipes with her mom and sharing with us.
Thank you, Revathy :)
UPDATE : Here's Revathy's feedback and one more tiny bit of info after reading this post:
"Hi Shn... Felt so happy and thrilled to see new post with Pooram ada.It looks almost same except the color.Does that taste good too!!! My mom told me people from Nair caste make different version of this ada that is small version of Ela ada with jaggery and cocnut mixture inside ..There may be variations depending on castes and families ...Anyway thanks a lot for trying out the recipe ..that too so soon."
Luv Shn
|
No part of the content ( articles, photographs, recipes) of this blog may be reproduced without my written permission.Copyright © 2007-2010 Kitchenmishmash.blogspot.com. All rights reserved.
|
 A simple unpretentious drink by description yet the moment you gulp down that first sip the suspicious glance hidden at the corner of the eyes earlier, turns into one of a pleasant surprise followed by nodding of head in agreement. And if such a down to earth blend is accompanied with some vivid tales and imagery from the past, that’s a recipe to win your hearts. Such recipes come with a soul and character of its own.
Here’s one such treasure that came in my mailbox last Monday. I let you all have a glance at some parts of that mail where the daughter, Prathibha captures her dad’s tales from the past in a very engaging mail which took me to a bygone era I ve watched only in movies. Let’s extend a warm welcome for this dad-daughter duo.
Hi Shn, Long time since I mailed you. How have you been? Warning : Long Mail!! Read when you have time :)
I just checked your blog and saw the kinnathappam post. Used to love it when achamma used to make it. But hate the one you get in bakeries these days, esply that raw taste. Did you know bakeries used to be called appakoodu? Dad tells me people rarely used to buy stuff from appakoodu and usually snacks are made at home in bulk. Dad's younger bro used to clean up all kinnathapam kept at home and when guests come, it will be just the dabba which they keep snacks. And achamma used to make achan run to the appakoodu to get snacks.
Since you have been collecting long-lost recipes, I thought I will send you this one. Chakkara-Vellam(water). According to my dad, this drink used to be popular in his youth. If I quote him "eppozhokkeya ee pilleru oru koopiyum thurannu thanniyadichirikkunne, pandokke, aval kozhachathum chakkara vellavumayirunnu. Kaikku nalla bhalamulla oruthan aval kozhakkum. Innathe pole machine-il idicha aval alla.. atha kozhakkan menakkeda..." He fondly remembers the time when people used to gather around/below some bridge in Kannur and have aval and chakkara-vellam.
I tried this out and so thought will send you the recipe.
By Chakkara , it means karipetti or pananchakkara (and not sharkkara). They used to be wrapped up in coconut/palm leaves made into a kotta. We get Karipetti here, small blocks of it. ……………..
Chop 2 shallots finely. Add a small block of mashed karipetti to it and mix with water. Salt is optional. It can be used instead of moru-vellam. I am attaching the pics, they dont look all that great and shallot pieces look quite big in it. Frankly, it took a moment to adjust to the taste. But I liked biting into the kutty shallot peices when you drink it. It is different from all the other drinks I have tasted. So I'd recommend you try it out once. After all, there is absolutely no effort in making it. ……………
Dad has a background story for it also.
Pandokke aalkaar marichal, relatives-ne okke ariyikkaan othiri dooram nadannu ponam. So the neighbours and friends start out to different directions immediately after the death is announced. They might have to walk for hours or sometimes days(Talking about the days when even telegram was pretty rare). This drink is simple that it can be made easily and the karipetti gives a lot of energy they need to walk. The neighbours only do every arrangement for the funerals including cutting the trees(esply maavu) and chopping it up into logs. So on the 16th day after death, the family of the deceased give food/sadhya to the neighbours and others who helped out in order to thank them for helping. Though these days the same tradition goes on of giving feast on 16th or 48th day after the death. .............................. ............
Take care Prathibha
“He fondly remembers the time when people used to gather around/below some bridge in Kannur and have aval and chakkara-vellam”. Well, reading that line, I was tempted to give it a try and I did. I must admit, it is a lovely pair. Considering the fact that both Aval Nanachathu and Chakkara Vellam do not require any cooking, I could very well see her dad’s point of having it not only as a simple snack and drink but also as an energy drink to those people who walked miles and hours together to pass the message to the relatives of the deceased.
Prathibha has asked to mix finely chopped shallots/small pearl onions/Kunjulli and crushed Karipetti or Panamchakkara ( a variety of palm sugar), with water and written that adding salt is optional. But I added salt and noticed that it brings out the distinct flavours of palm sugar very prominently. I didn’t have Karipetti or Panamchakkara at home, but had a block of Thenginchakkara which is similar but made from the sap of coconut palm, I guess. While sipping it , I was having a strange thought it could very well be converted to an exotic mocktail/refreshing drink if you serve it chilled in a stylish martini glass and baptize with a fashionable catchy name!! :)
Prathibha , Thanks a ton for sharing such an interesting read and also letting me publish it here. Hope you and your dad will have more tales and recipes of the past, to share with all of us. I extend my whole-hearted gratefulness to both of you :)
Related Posts: 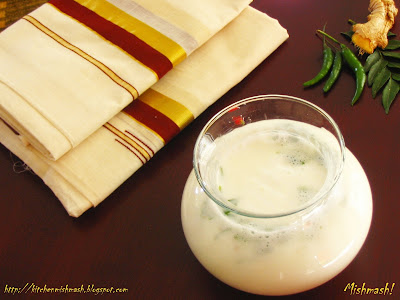   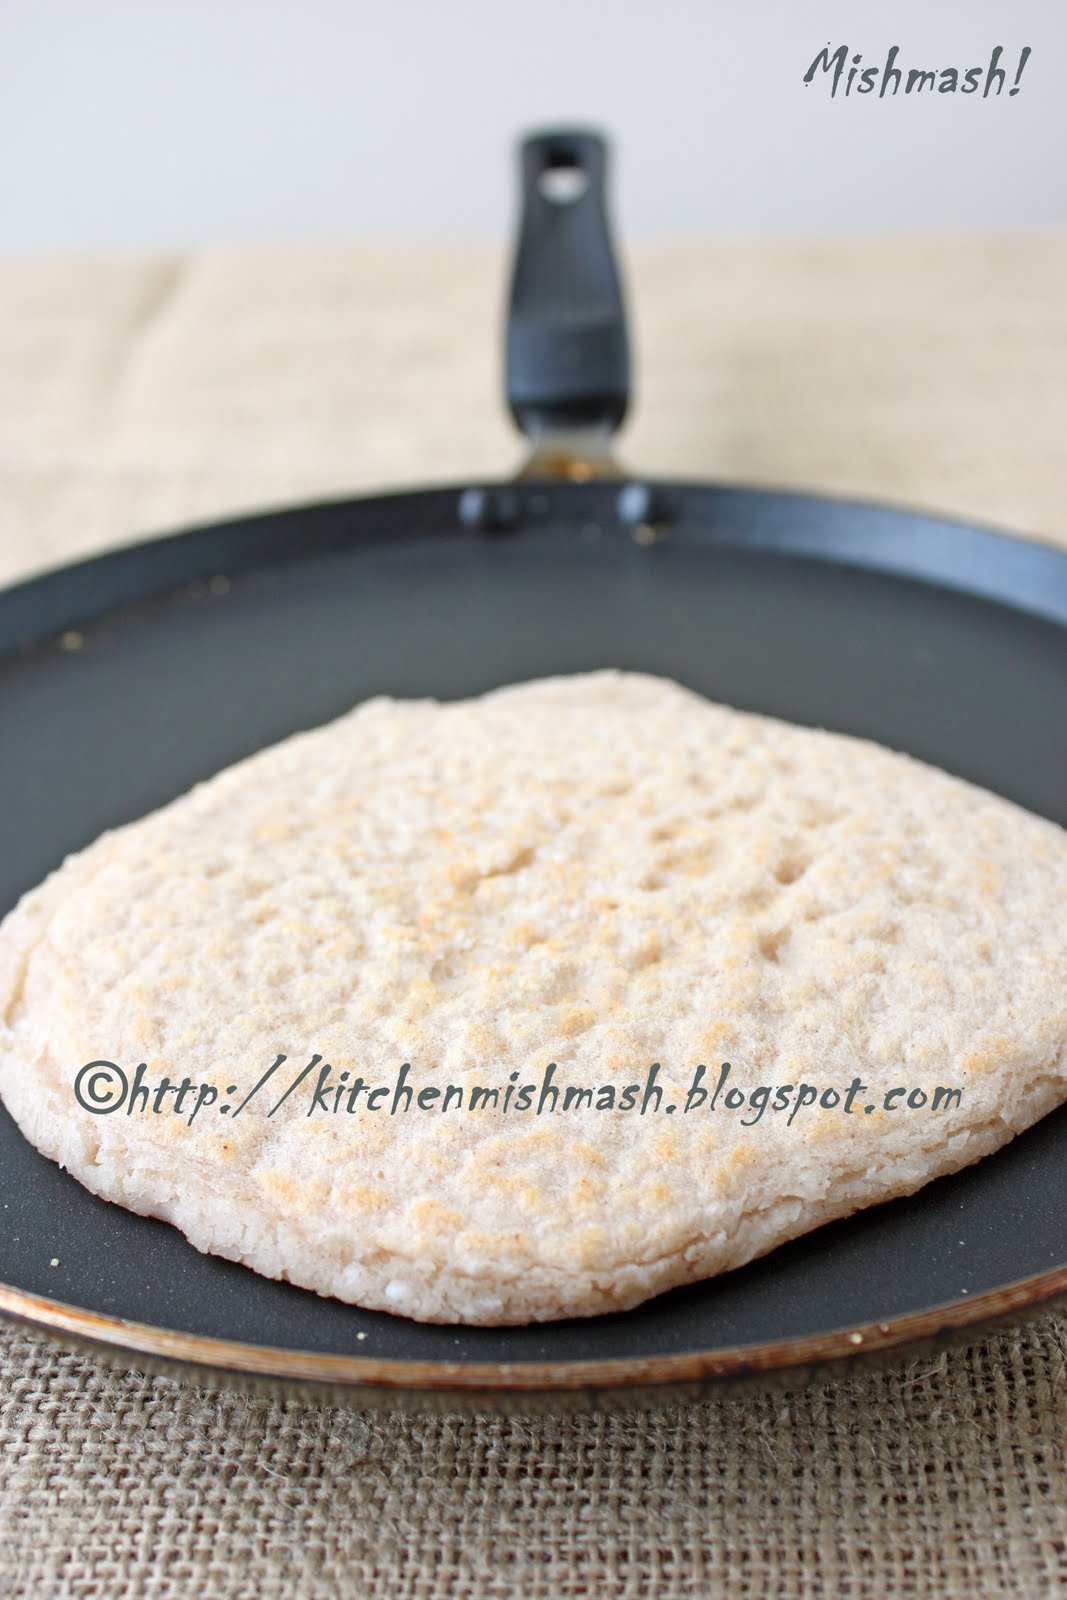   Luv Shn
|
No part of the content ( articles, photographs, recipes) of this blog may be reproduced without my written permission.Copyright © 2007-2010 Kitchenmishmash.blogspot.com. All rights reserved.
|
“Heard melodies are sweet, but those unheard are sweeter…” How eloquently Keats captured the power of imagination in those beautiful lines!!!! And I must admit , when it comes to food, never tasted or seen, my imagination has no bounds, especially if the food in discussion is painted with a heightened magical image through someone else’s words……
…..that was the case with Kinnathappam (Kannur Style) ever since Revathy left that message three months ago. Till yesterday, it was a taste unknown with not even a picture to refer to…..something that was enchanting and charming from the old cultural town of kannur …….something I wanted to taste on my next visit to this place, from one of the bakeries in those crowded streets …and in my imagination, I saw it wrapped in a clear plastic, arranged in the glass shelves of that tiny bakery…some were white and some, in a light brown hue……
…but now, I associate the word Kinnathappam with a white, soft , dense pudding cake that is cooked with ground rice ,in the delightful richness of cream of coconut and divine ghee, sweetened with sugar and flavored with cardamom and the pleasant surprise bites of cooked split gram!! Now if I walk into one of those bakeries in that old town, it is definitely not like a blind struggling to point his choice in complete darkness.
My puzzle board is still incomplete with lots of missing pieces and they range from the socio-cultural background of this snack, existing variations, the right texture, the colour – sugar or jaggery …the list goes on. At this point some of the connecting links on my puzzle board is woven with a handful of comments and messages left by my readers and blog buddies and the recipe my aunt shared.
Revathy’s messages often described Kinnathappam like this “ Kinnathampam is nnormally made in large quantites for housewarming or weddings at home, nowadays we get it from bakery shops so no one bother taking the hardwork to prepare it.I saw ppl making it in big uruli at my home for big functions when I was a kid but dont really remeber the ingredients.I will ask my mom about the recipe and let you know. Revs”
The cheerful young blogger , Ria from Kannur wrote : “I am from Kannur as well and I must say kinnathappam & kalathappam is a very yumm snack! Revathy, thanks for sharing the recipe with Shn! Shn, please try it out soon and post it! It's usually made in Hindu homes here...so we don't have a recipe for it :) “
A reader named Deepthy left this message on my Orappam post : “It looks like kinnathappam.My amma used to prepare it with rice flour,jaggery.We also add dried mango seeds powder in it.Deepthy “
In pursuit of finding out more about this snack, I asked my mother to approach my aunt, S from Kannur and she was gracious enough to share her recipe over the phone and my mother jotted down the gist in her own language : “ 1 glass ari…1 tbsp kadala-parippu…kadala parippu uppittu vevikkuka…..thenga ara-muriyude paal ozhichu panchasaara ettu elakkuka…..onnu kattiyakumbol ¼ glass nei ozhichu elakkuka….pakuthi aakumbol kadala-parippu eduka…urundu varumbol, paathrathil ozhikkuka…”
Well….well….these are two women who belong to the “ a glass of this, a handful of that and a pinch of this- generation” and trying to comprehend their language by someone who belongs to “ a cup of this and a tbsp of that – generation” is like…..well , let me not get into that aspect. I was totally confused!
I went back to Revathy and she promptly replied : “Hi Shn, I asked my mom about the kinnathappam recipe.She never tried at home in small quantities.She said it takes hrs to to make it,and we should keep stirring the batter until it become thick halwa like consistency.The main ingredients are coconut milk ,rice powder ,jaggery ,cardomom,split dal cooked.Mix all ingredients like watery consistency except ghee and in a Uruli keep strring until it become thick and then add ghee cardomom.,this is the vague idea about the recipe amma knows.She had seen it done in large quantites during house warming or weeding at our family. Take care, Revathy.”
Now the question was whether to add sugar or jaggery and Ria, my local consultant and subject expert in this case, mailed me :” As far as Kinnathappam goes I have always seen them in blurry white colour.It is not as white as vattayappam, but more or less like kanjivellam colour . So it is definately made using sugar as sweetener. Even I have heard that the process is like halwa-making...2-3 hours of continuous stirring. But the end product is yum!”
And here’s how we tried to put together the pieces of the puzzle, with the help of my mother :  Recipe Source: My aunt S from Kannur
What we took: - 1 cup jeerakasaala /kaima rice, soaked for 4 hours in water
- 4 tsp Kadala-parippu/split gram/chana dal, soaked in water
- 2 cups freshly squeezed coconut milk
- 1 ½ cup sugar ( adjust as per sweetness)
- ¼ cup + 2tbsp ghee/clarified butter
- 10 pods of cardamom, powdered- adjust as pert your taste and strength of the seeds ( Added based on Revathy’s mail)
- Salt
What we did: - Grind soaked rice into a fine paste, adding required water to operate the Indian mixer.
- Cook soaked Kadala-parippu/split gram/chana dal with a pinch of salt until soft ( either in a pressure cooker or sauce pot) and once cooked and warm, gently press with your fingers and make it soft yet retaining the shape.
- Mix ground rice , coconut milk and sugar with a pinch of salt; pour this to a heavy bottom large sauce pot/wok and start stirring on a low-medium heat. Stir continuously. When it starts to thicken and show some resistance to easy stirring, pour the entire ghee and stir continuously. When it thickens more, add cooked Kadala-parippu/split gram/chana dal and resume stirring incessantly. When you see the dough starting to come together in the centre as one mass, take a small amount and try to roll and make it into a ball with your thumb and index fingers and if it shapes up beautifully without sticking to your fingers, then it is time to turn off the stove and add the powdered cardamom; immediately transfer it to a 6 *2 round cake pan/or a “Kinnam”/any round old fashioned plate with borders – smeared with some ghee; Fill the cooked dough in the pan and flatten smoothly. Let it rest in the room temperature for 1-2 hours and when it is completely cool, cut into small squares and serve. This whole process of cooking one cup ground rice with other ingredients took us about 50 minutes of stirring continuously.
Taste verdict: Tasty, no doubt ! Richness of coconut milk, sugar and ghee is very prominent. The occasional bite into split gram offers a pleasant surprise. Texture we got was that of a dense yet soft pudding cake.
Wonder if we got the texture, colour and thickness right! Would love to hear the feedback, suggestions and recommendations from the Kannur’ians out there. I would also love to learn more about this snack…..your stories, memories and socio- cultural significance of this snack. Please help !
My sincere thanks to My aunt S , Revathy, Ria and my mother for all their help and guidance in bringing out this post.
Related Posts:  
Luv Shn
|
No part of the content ( articles, photographs, recipes) of this blog may be reproduced without my written permission.Copyright © 2007-2010 Kitchenmishmash.blogspot.com. All rights reserved.
|
A name I heard occasionally from the women at my paternal side……...a picture or two I saw at the time I started scanning through the food blogs on Kerala cuisine……and when I browsed through those recipes, the doubts that evolved, based on a murky memory of me, tasting the same at a very tender age when my taste buds were not matured enough to tolerate such a taste, yet uncertain enough to buy that skeptical mind…..the state of being intimidated seeing the recipes and methods and the fear to try out something without any point of taste-reference in the past ……..and the (mis) perception that slowly got absorbed into my head that it is a northern Kerala delicacy ……..that was pretty much the data , the hard-disk of my brain could extract whenever I saw the word Kalathappam/kalthappam ! !
And then came that comment around three months back, from someone named Revathy, a name unfamiliar to my comment section till that day and she left this message :
“Hi mish,I was googling for kinnathppam recipe and one link was to ur site,and you wanted to know the kalathappam and kinnathappam recipe.I am from Kannur so kalthappam is one of our teatime snack back in india.I made it today after a long time and came out so well so I thought of sharing it with you as you want to know the recipe.Well about kinnathappam is normally made in large quantities and its a long process ,I remember once that was made in our home in big Uruli with 2-3 people continuosly stirring it for hours. my kalathappam came out good for the first in US.I tried soaking grinding basmati and other rices but didnt came out well. I used Nirapara Aripodi this time. here it is goes: nirapara aripodi 2-3cups, Vellam/Jaggery - as per sweetness, cooked rice - 1 cup, cardomon -6-7 , thenga kothu -11/2 cup, small onion - 1/2 cup, cumin seeds - 1/2 tsp, baking poweder - 1tsp, ghee /cocnut oil- as per req ……… Make a batter with rice powder ,melt the jaggery mix it well then grind the mix with cumin seeds ,cardomom , baking powder and cooked rice.the consistency of the battery kind of loose not so thick. then leave the mix for 2-3 hours room temp. Now heat the entire batter continously stirring ,be careful at this time,u shud keep stirring all part as it get cooked else.heat it for 2-3 mints. heat coconut oil or ghee in the pressure cooker roast thengakotthu and onions add some cardomom powder also.once it started turning brownish remove it from the cooker.then add some more ghee or cocnut oil again spread it little on the sides of the cooker since appam puffs out ,so it will stick on the sides.now pour the mix in the cooker then scatter the fried thngakotthu and onion.keep the stove on high then close the lid without Whistle .cook for 3 mints on high flame now fully lower the stove cook it in low flame for 10 mints turn off the stove. leave it for 30 mints and open the cooker.carefully remove it from the sides first then it will easily come out if u put the cooker upside down slightly on a plate. This is not a comment Shn. Love “
Revathy’s admiration for the snack from her hometown, her passion for cooking and open mindedness to share the recipe and moreover, the care and trust that she showed in me that I would be giving it a try for sure, was enough to earn my respect , both for the person and for the recipe she shared with me. As much as I was intimidated by the method and the pressure cooker steaming part, I gave it a try two months back ,by halving her recipe . Though we developed an instant liking at the first bite itself, the texture of my steamed version was not anywhere close to what she had painted or what I had seen earlier in other blogs. The bottom layer of fried coconut slices and onion got burnt and the texture was no where near the word, fluffy. I knew I messed up at the consistency of the batter as well as the temperature control department. After a couple of mail exchanges with Revathy, she gave me some important pointers like “practice of using raw rice for grinding, instead of rice flour….picking rice that is not starchy at all….and the liquid like consistency of the batter ….and mixing the ghee roasted coconut and onion slices to the batter instead of layering at the bottom to suit the electric stove temperature setting…“
In the meantime, I had asked my mother to get in touch with my aunt from kannur, knowing very well that I was on the right track. And on a crumbled piece of paper, I got to read my aunt’s recipe jotted down by my mother during her telecon and that piece of paper carrying my aunt’s instructions gave me the crucial info which said “ grind 1 glass kaima rice or biryani rice with 1 1/2 tbsp cooked rice and sharakkara-paavu/jaggery syrup thoroughly without adding water or very little water ( if required) to a dosa batter consistency and later heat it in cheru-theeyil/low heat…” and the picture and recipe given below is from the recent second attempt , under the guidance of my mother.
 Here the main frame-work is based on Revathy’s recipe and supported by my aunt’s instructions and tips on the process. My aunt’s recipe doesn’t mention baking powder and it is very obvious that it is not a conventional choice either. But from the very little information I was able to collect on this topic, conventionally Kalathappam/kalthappam, was not cooked in pressure cooker either. What I learnt was , it is cooked in a Uruli/bell metal vessel and cooked covered with a lid, topped with some coal/dum method- a conventional style of baking. Please correct me, If I am wrong! But just like some out there who started using baking powder as a short cut to give fluffiness in deep fried fritters like Uzhunnu Vada, Pazhampori et al or replacing the dum method with oven baking for making biryani, here in this recipe also, I feel the use of baking powder and pressure cooker steaming is a modern day interpretation to get the old world taste staying within the given functionalities of our modern day kitchen.
(Recipe Source: Revathy from Kannur ; Instructions : My aunt from Kannur ) Ingredients: - 1 cup Kaima /jeerakasaala rice soaked for about 4-6 hours
- 1 cup melted & filtered light brown jaggery/Vellam/Sarkkara thick syrup ( Adjust as per sweetness and consistency of the syrup)*
- ¼ cup cooked rice, loosely packed
- ¼ cup thengakothu/ small coconut slices
- ¼ cup Kunjulli/red small pearl onion, thinly sliced
- 4 pods of Elakkaya/cardamom
- ¼ tsp Jeerakam/cumin seeds
- 1/2 tsp to 3/4 tsp baking powder
- Salt to taste
- 3tbsp ghee/clarified butter
Directions: - Wash and soak rice for about 4-6 hours; drain the water and grind in a mixer along with melted jaggery, cooked rice and a pinch of salt, to a fine/smooth and pouring consistency batter ( like dosa/vattayappam batter) without adding water. Towards the end, add cardamom, cumin seeds and baking powder and grind and mix well with the batter. Pour this to a saucepot and leave it on the kitchen counter for about 1 hour.
- Heat ghee in a small pressure cooker and fry thengakothu/ small coconut slices till golden brown, in medium heat. Remove with a slotted spoon to another plate; now add the sliced small onions and sauté till lightly browned/caramelized and remove with a slotted spoon and keep it aside.
- Now heat the batter in the saucepot, in very low heat and stir continuously, until the batter is warm to touch. (Note: Please do not let the batter cook at this stage; it’s only meant to be warmed a bit.) At this stage remove from the heat and continue stirring , else the temperature of the saucepot would continue to cook the batter at the bottom, creating lumps which is to be avoided by stirring continuously.
- There is enough ghee left in the pressure cooker now and swirl the cooker to give a coating of ghee on its sides. Quickly mix half of the fried coconut and onion slices to the batter and pour to the pressure cooker and top with the leftover fried coconut and onion slices; lock and secure with its tight lid, with rubber and without the weight/whistle………: I do not have a gas stove and controlling the cooking temperature is very tricky and significant in this case. Hence, Electric stove users with coiled burners, need to be a bit cautious. On my mother’s suggestion, we heated two small burners at the same time and kept one in low heat (at 3 )and the other at medium ( at 5) and cooked the first 2 minutes in medium heat and then moved the cooker immediately to the one with low heat and cooked for around 18-20 minutes; after turning off the heat, moved the cooker to another unused burner and left it there for the next 15 minutes. (Note: I think, Gas stove users can cook in high heat for about 2 minutes and reduce the heat to low and continue cooking for the rest of the cooking time as heat controlling is easier with gas flames ). Now , Open the cooker carefully and check its doneness by inserting a knife or wooden skewer and if it comes out with very little crumbs here and there or none at all, with its edges separated from the cooker, then it is cooked to perfection. Now let it cool completely. At this point, keep a plate, slightly bigger than the cooker and invert carefully and gently and the steamed cake would come off easily. If you’ re having trouble, gently try to lift the steamed cake with a flat spatula, from the bottom and sides and then try to invert ; once you get Kalathappam/Kalthappam perfectly round in shape, gently flip and serve with the crowned part as the top ; slice into wedges and serve with tea/coffee.
Based on the very little information I could grab on this snack, I had a strong inclination to brand this snack as a Northern Kerala delicacy as it is generally perceived to be, until I saw this video below from a cooking segment, telecast by a Malayalam TV Channel. For those who cannot understand Malayalam, this segment throws light into the fact that Kalathappam is a popular snack, not just in Northern Kerala but around the extreme Southern regions of Kerala too, though with a slightly different interpretation which can be beautifully categorized under the term, regional variation. In these parts, they call this snack Kalathappam or Melchatti Appam. The main variation in this recipe is the use of cooked green grams/cheru-payar and the video shows how ingredients like rice flour, jaggery, coconut and cooked green grams are blended and stirred continuously to a thick batter and finally finishing the cooking with ghee roasted nuts and raisins, drizzled with more ghee and then covered and topped with coal to finish off the final cooking. That makes me conclude that at times, there is a general tendency on some of our part to generalize a cuisine without having proper research or based on some half cooked information out there or simply because of our ignorance or lack of understanding.
A bouquet of thanks to Revathy , My aunt and my mother :)
Luv Shn
|
No part of the content ( articles, photographs, recipes) of this blog may be reproduced without my written permission.Copyright © 2007-2010 Kitchenmishmash.blogspot.com. All rights reserved.
|
 There have been times in the past when a certain remark in the comment section sparks an idea for my next post... on one occasion it took me down the memory lane making me write about the simplest things from our kitchen and on another, it helped me rekindle the memories of my childhood and recreate the forgotten taste. This time, it is neither about a dish nor a recipe but to introduce a couple of old world techniques to some out there, who may not be aware of the same.
On my previous post, Small talk left a message saying," .........Just a tip : Taste can be enhanced and oil used can be reduced by wrapping fish in plantain leaf and griddling it on a tava and later shallow fryng it in oil....Doing this nt only seals on juices of the fish inside bt reduces oil used drastically....." .
Though I have been using a similar technique occasionally - especially those days when both of us found out that we have to keep a tab on our cholesterol levels - to reduce the quantity of oil while frying , it never occurred to me that I should make a post on it. But after reading her comment, especially the part about taste enhancement and reduction in the use of oil, I thought it is a good idea to bring this old world technique into the limelight. I started using this method about two years back as both of us could not appreciate the taste of baked fish and continued to crave for that pan fried fish and that's when my mother gave me this idea for frying the fish on fresh banana or plantain leaves.
The technique suggested by Small talk is a very healthy alternative and works well with fatty as well as non fatty fish. Our method is slightly different from the one Small Talk has mentioned. In her's you can control the oil to a large extent and yet get that oily crispy outer texture by pan frying in oil in the final phase after the initial steaming or roasting where the fish gets cooked in its fat and juice.
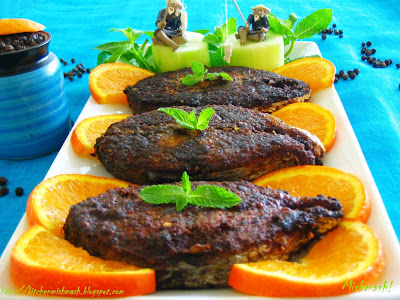
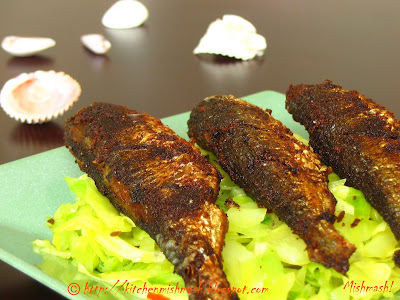
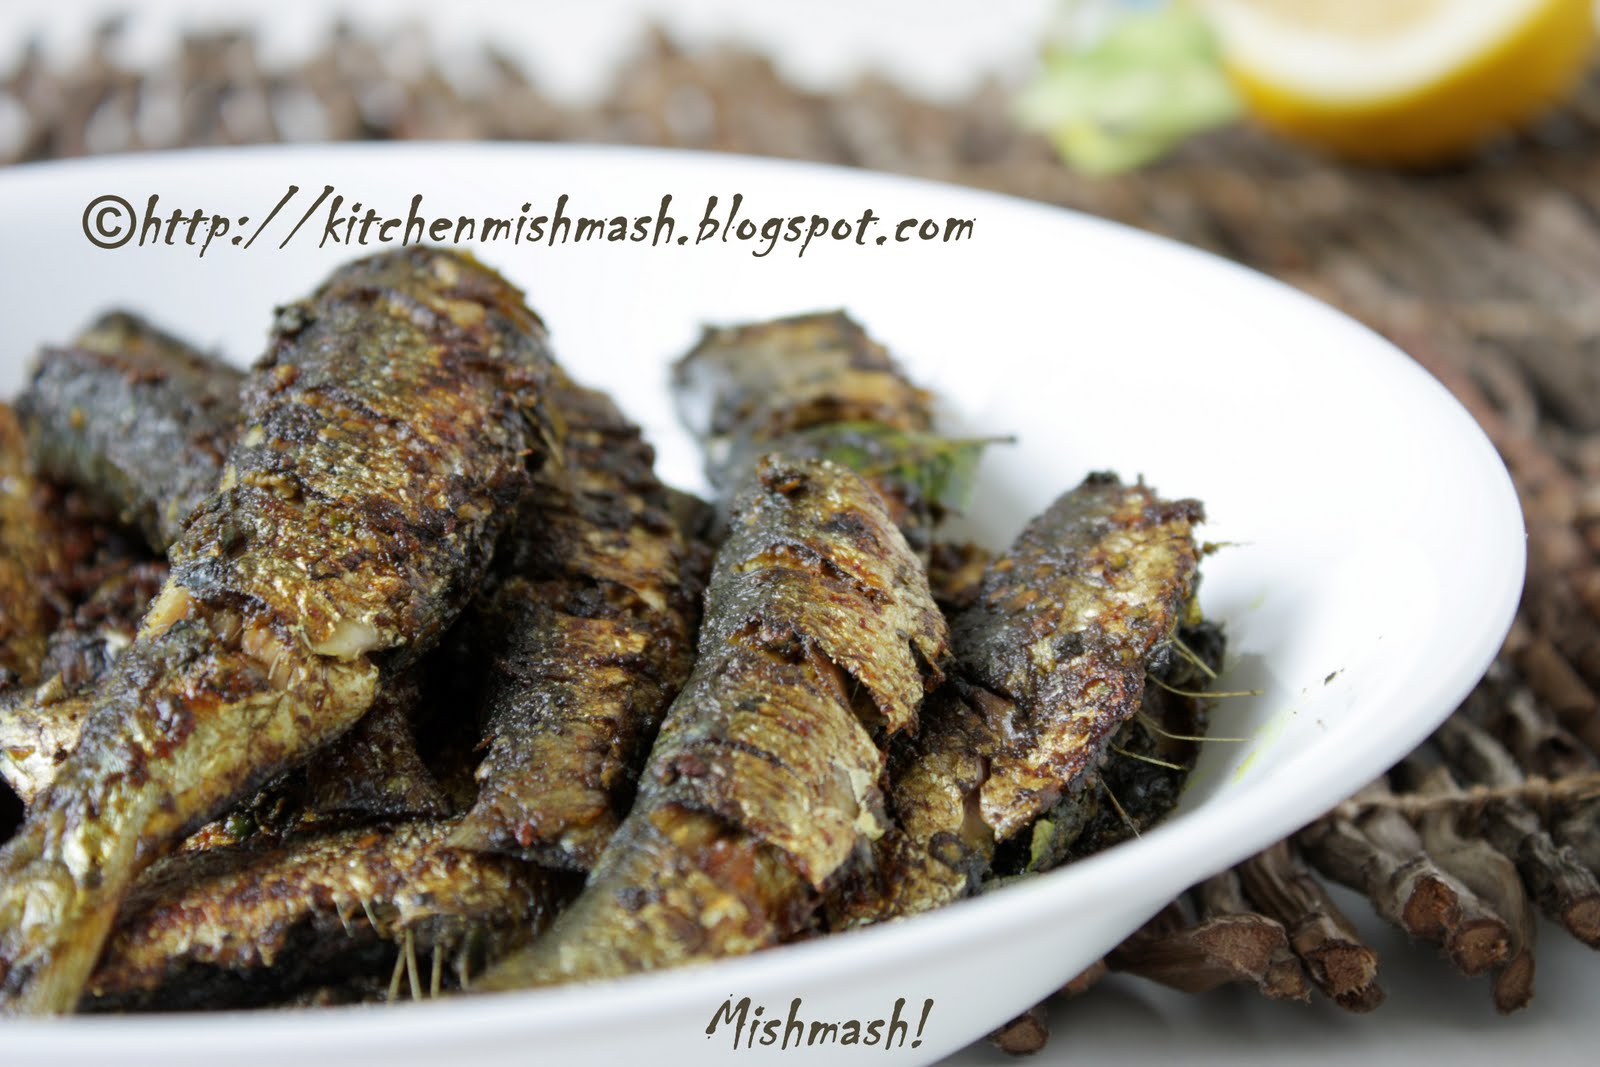
The method we follow is slightly different. We wilt the banana/plantain leaves on the heat for 2-3 seconds and then place the wilted leaf on a well heated cast iron or non stick griddle; then place the fish pieces on a single layer (not stacked); drizzle some cooking oil on fish pieces as well as the leaf and let it cook/fry in medium-high, with the lid covered, for about 3-4 minutes. Now reduce the heat to medium and when one side is cooked well, flip the fish and cook the other side. If you want a crispy exterior, you can flip one more time ( after both the sides cooked) and at this stage, remove the lid and let it cook /fry , until you get the crispy texture you aim for. Based on my experience, this method works well with fatty fish as fish releases its natural fat/oil, allowing us to use lesser quantity of oil. If you re using small variety of fish like sardines, then you need not close with lid while cooking; use lid only if it is a thick cut fish like king fish or Indian mackerel or salmon.
Both these techniques enhance the taste as the fresh banana/plantain leaf lends a subtle earthy flavour and aroma to the fried fish.
Prathibha of Rhythm of Life has shared another tasty alternative and that's by roasting the fish marinated with spice mixture and wrapped in banana/plantain leaves , on a bed of coal aka " kanal". It is an old world technique to bake fish but a very tasty alternative provided your kitchen has the place and potential to use coal :)
Small Talk & Rhythm of Life, Thanks a bunch for sharing such healthy and tasty cooking methods :)
You may use any of the recipes listed below to make your favourite fish fry:
Luv Shn
|
No part of the content ( articles, photographs, recipes) of this blog may be reproduced without my written permission.Copyright © 2007-2010 Kitchenmishmash.blogspot.com. All rights reserved.
|
A thoughtful gift from my reader!  The picture below is what Liz sent me for my reference.
 I know , some of us food bloggers, have a more or less same or similar morning routine……Waking up next to your loved one……..enjoying the sun rays coming through the window….embracing the new day with lots of hopes and plans…..sipping a hot cup of tea/coffee…..logging in the computer and checking the mails and comments, if any……and sometimes we feel a sense of satisfaction realizing that the recipe we blogged became someone else’s family favourite or sometimes we blush reading a nice sweet comment from one of our fellow bloggers or readers or sometimes a humorous comment lightens up our mood and spirit and very-very rarely a bad or disheartening comment that spoils your mood ! On one such day when I was enjoying my morning tea and CJJ was reading out a few comments I received the previous night, we came across a comment from someone named Liz who introduced herself and said how much she enjoyed my posts and the way she appreciated me, made my day!! She became a regular here and also showed her interest in sharing some of her family favourite recipes with me. In between she kept contacting me through the comment section clearing her doubts on the Blackforest Cake recipe. And one fine day, I received a mail from her with a picture of the Blackforest cake she made, based on the recipe I posted! If you are a food blogger, you can imagine how thrilled and excited I was receiving such a beautiful gift from one of my readers!! The story does not end there, she shared a couple of her family favorite recipes with me and Chicken Biryani was one among them. Liz is married to a Muslim family and when she shared her MIL’s classic Chicken Biryani, that was one more reason to try it out immediately for me who was already on top as this was the first time I received such a gift from one of my readers. I really felt good! Since this Muslim Style Chicken Biryani- Indian Rice flavored with spices and herbs in ghee & layered in curried meat, was a hit at our place, I thought of sharing it with you all. This was a gift for Mishmash! and now this is a gift for you all from Liz:)Before I go to the recipe writing, let me write something for my non-Indian readers and bloggers. The number of ingredients and the steps involved in cooking might stop you from trying this dish. Cooking Biryani is time consuming and process oriented but it is worth the effort. An easy route to enjoying a Biryani is probably hitting a good Indian restaurant in town, but to relish an authentic Indian Biryani, one has to go through all this process and it is worth the effort, not just because of the taste but the fact that if there is some leftovers, you can enjoy it the next day too and that’s when it tastes the best!! What you might taste from an Indian restaurant is nothing compared to the home cooked authentic Biryani. Recipe follows: Kerala Muslim Style Chicken Biryani: (Serves 4-5 adults)Ingredients for cooking rice:- 4 cups Basmati Rice (I use Tilda )
- 8 cups water or more depending on the cooking method*
- 10 Cloves
- 8 Cardamom pods
- 5-7 small ½” inch long Cinnamon sticks
- 1-2 bay leaves (Optional)
- A handful of fresh mint leaves
- 2 tsp freshly squeezed lemon juice
- Salt to taste
Ingredients for cooking Chicken:
Step 1: To shallow fry the Chicken:- 1- 1 ¼ kg (Approx. 2 ½ lb) cleaned & cut chicken pieces
- ½ tsp turmeric powder
- ¾ tsp red chilly powder
- ½ tsp garam masala
- Salt to taste
- Oil for shallow frying.
Step 2: To prepare the Chicken KurmaStep 2:A) For the spicy paste:- 1/3 cup sliced garlic (Approx. 50gms)
- 1/3 cup sliced ginger (Approx. 50gms)
- 20-26 Indian Green chillies (Approx. 75gms) (adjust as per your tolerance level)
Step 2:B)For Sautéing:- 2 tbsp ghee
- 4 cups thinly sliced big onions (Approx. 300 gms)
- 2 cups chopped or 2 big tomatoes
- ½ cup yoghurt
- ½ - 1 tsp red chilly powder
- 4 tsp coriander powder
- ¾ tsp turmeric powder
- 1/8 cup lightly packed chopped coriander leaves
- ¼ cup lightly packed chopped mint leaves
Step 2:C) For grinding the Masala Powder- 10 cloves
- 8 cardamom pods
- 3-4 small 1” inch long Cinnamon sticks
- ½ tsp Shajeera
- 1 tsp fennel seeds
- 6 mace
Step 2: D ) For the nutty paste (Soak in water for 30 mins before grinding)- 15 whole cashew nuts
- 5-10 almonds
- 1tbsp poppy seeds
For layering & garnishing:- ½ cup raisins (preferably golden raisins)
- ¼ - ½ cup cashew nuts
- 1 medium size big onion, thinly sliced
- 3tbsp + 2 -3 tbsp ghee + more ghee/ oil for frying onions
- 1/2 cup finely chopped fresh coriander leaves.
- A pinch of saffron
- 2tbsp warm milk
For the aromatic masala powder:- 2-3 cloves
- 2 cardamom pods
- 3-4 small ½ “ inch long cinnamon sticks
- 2 tbsp ghee
Directions:- Make the Chicken Kurma : To shallow fry the chicken first, make a marinade with turmeric powder, red chilly powder, garam masala and salt with some drops of water and apply it on the chicken pieces and leave it in the room temperature for 30 minutes and then shallow fry in oil, not more than 4 minutes, including both the sides. This phase of cooking is done mainly to enhance the taste of the chicken as well as to keep the pieces slightly firm in the cooking process to follow.
In a big cooking vessel, heat 2 tbsp ghee and sauté thinly sliced onions, until golden in colour; make a fine paste of ginger, garlic and green chillies (Step 2: A)and add the same to the cooked onions and sauté till they turn a nice brown colour (Note: This will fetch you a darker brown colour for the chicken Kurma, as shown in Liz’s picture. I did not cook till they turned dark brown and hence the lighter shade for my Kurma.) At this stage, add tomatoes and mix well; add chopped coriander leaves and mint leaves and combine well; add the ground Masala powder (Step 2: C), chilly powder, coriander powder and turmeric powder and mix well with all the ingredients and sauté, until the raw smell of the spices is gone, for a couple of minutes. This is base of the Chicken Kurma masala and it will be dark brown in colour. Once the raw smell is gone, add the shallow fried chicken and cook covered in medium heat. If the chicken was not shallow-fried for a longer time, then this stage will produce some water from the chicken, during the cooking time; but if the chicken is dry and there is no gravy at all, cook with very little water and salt. When the chicken is half-done, add the yoghurt and cook covered and when it is almost done, just before turning off the stove, add the nutty paste of nuts, almonds and poppy seeds (Note: Nuts, almonds and poppy seeds should be soaked in water for 30 mins before grinding them into a fine paste) and cook for a couple of minutes. Chicken should not be overcooked at all or it should not fall off the bones. The Kurma will be a thick, creamy and rich gravy. (Note: Adding the nutty paste will change the really dark brown colour of the chicken kurma to a lighter shade.)
- Cook the Rice:
Microwave Method:Wash Basmati rice well. In a microwave safe bowl, pour 8 cups of water, add rice and whole spices mentioned above, in the respective section, along with bay leaves and a handful of mint leaves and salt to taste and cook until the rice is just cooked. Since my microwave compatible bowl is not large enough to accommodate so much of rice and water, I halve the ingredients, i.e 2 cups of rice and 4 cups of water with half of the spices and herbs and microwave for 23 minutes. This way, you can make sure that no two grains stick to each other. Immediately after the microwave cooking, using a fork, gently separate the rice, so as not to get sticky and sprinkle 2 tsp fresh lemon juice. Please note that you should halve the quantity for lime juice too, if you are cooking the rice in two batches.
Stove-top Method: Liz follows stove top method for cooking rice and she does that in the old fashioned way where in a huge vessel is heated and when water is fully boiling, add the washed rice and whole spices and herbs and cook the rice uncovered, for 12-15 minutes. When the rice is cooked (do not overcook), drain the excess water immediately and sprinkle the fresh lemon juice.
- Prepare the garnish:
For the aromatic masala powder used in between the layers, heat 2tbsp ghee and fry the whole spices, mentioned in the respective section; and grind these into a fine powder. Save this ghee in a small bowl for later use.
Fried Nuts and raisins: In the same pan, add 3 tbsp ghee, fry the raisins, stirring continuously until they turn plump or look like golden grapes and keep them aside; fry the cashew nuts in the same oil, till they turn golden in colour and keep aside.
Fried caramelized onions: Add more ghee or oil to the same pan, to fry the thinly sliced onions till they become golden brown; at this stage sprinkling a pinch of sugar to the onion, while frying, to get a taste of nice caramelized onions is a good idea; remove the fried onions from the oil with a slotted spoon and let them drain on paper towels.
Saffron Milk: Heat 2 tbsp milk and a pinch of saffron
- Get your work-area ready for layering with Chicken Kurma, spices and herb flavored cooked rice, fried nuts, fried raisins, fried onions, saffron milk, ground aromatic masala powder and the leftover spice flavored ghee and some 2-3 tbsp fresh ghee and finely chopped fresh coriander leaves.
- Final layering: This Chicken Biryani can be prepared either in a conventional oven or through the Dum method. Click here, to get a better idea for the Dum Method. Choose your cooking method and depending on your choice, choose your cooking vessel. Grease your cooking dish generously with some ghee. Randomly place some chicken pieces along with gravy in the bottom of the dish; then spread some cooked rice, (do not stack); sprinkle a pinch of ground aromatic masala powder; some fried nuts, fried raisins, fried onions and finely chopped coriander leaves; sprinkle some spice flavored leftover ghee (the one used for frying the spices for making the aromatic masala powder) and also a few drops of saffron milk. Repeat this layering process 3 or 4 times, depending on the quantity of the rice and meat as well as the largeness of the vessel. Reserve some fried onions, nuts and raisins for final garnishing before serving.
- Final cooking:
Conventional Oven Method: Preheat the oven to 350F. Close the oven safe dish with aluminum foil and bake for 20-30 minutes.
Dum Method: Perfectly seal the lid with the dough and cook in low heat for 20-30 minutes.
- Serving: After the final cooking, keep the dish covered for minimum 30 minutes. Ideally, a window of 30 mins to 2 hours is suggested, to get a better taste, and for all the flavors to set in thoroughly. Place your individual serving platter; Just like you slice a cake, dig with a bigger serving spoon and transfer it to the serving platter; you should not mix the rice and meat; it’s already layered and hence just transfer it to the platter and garnish with some fried onions, nuts and raisins. Serve with Raitha (Coarsely chopped onions, tomatoes and cucumber mixed in yogurt and seasoned with a dash of salt and pepper), Indian pickle, Pappadam (Indian wafers) and a chilled Diet Coke or Pepsi :)
Cooking Schedule I Followed : - Cut and clean the chicken; marinate the chicken pieces.
- Chop the onions, cut the tomatoes peel and slice the garlic, ginger and green chilly, and chop the herbs.
- Make the spicy paste of green chilly, ginger and garlic
- Soak the cashew nuts, almonds, and poppy seeds
- Grind and powder the Masala powder
- Shallow fry the chicken
- Prepare the Nutty paste
- When half of the chicken is fried, start sautéing the veggies and make the base masala for the Chicken Kurma
- Prepare the chicken Kurma.
- While chicken is being cooked, wash and cook the rice with spices and herbs.
- Fry the whole spices in ghee and grind and powder them into aromatic masala powder and reserve the leftover ghee.
- Fry the nuts and raisins and onions
- Prepare the saffron milk.
- Get the work area ready.
- Final layering
- Final Cooking
 Verdict & Recommendation: When I finished preparing the Chicken Kurma, I was sure this is going to be a super hit in our place and when I finished cooking and served it , the first response was, ”Adipoli” meaning ”Excellent”!!. It has a nice aroma and the Chicken Kurma is medium spicy which gives a distinct character to the Biryani. The chicken Kurma on its own is very tasty and can be served with Nan or Roti (Indian breads). Though the rice preparation is different from the general method of washing and draining the rice and then roasting that in ghee along with whole spices, it does not reduce the look or taste of the flavored rice. I will be making this again on special occasions and to treat my friends and guests. Liz suggests one more method to make the look appealing; she suggests mixing some lemon juice with a pinch of turmeric powder or saffron and add it to ½ cup cooked rice and reserve and sprinkle this on the top layer to get some colour, as she has done in her picture. This dish taste better the next day but since we cannot serve one day old food to our guests, better to prepare it in the morning if guests are invited for dinner! The amount of ghee given in the recipe is my personal choice , one is free to use more than the noted measurements, it will only increase the aroma and taste.
I have thanked Liz enough already for this very sweet gesture of hers but it is ok if I tell this one more time, "Thank you, sweetie :) "
On another note, I thank all of you who dropped a comment checking on me and visited my blog the last one week. Thanks a lot for showing interest and I appreciate that a lot. Now that I am back, I will catch up with all of you in your blogs :)
Luv
Shn
|
No part of the content ( articles, photographs, recipes) of this blog may be reproduced without my written permission.Copyright © 2007-2010 Kitchenmishmash.blogspot.com. All rights reserved.
|
|
|
|
|


 All text and Photographs are copyright protected.
Copyright © 2007-2010
Kitchenmishmash.blogspot.com. All rights reserved.