Please respect the fact that this is a humble attempt from my side to record some recipes, handed over to my family through grandmas & great-grandmas and also share some favourite dishes of my family, including the one I married into. All the content in this blog (text and photographs) are mine, unless noted otherwise. Copying, re-writing, republishing, redistributing or altering any text or photograph or part of the text, for any commercial or non-commercial purposes, without my written consent is strictly prohibited. Users with non-commercial purposes may link to the page or a specific post, but not allowed to reproduce or alter the content( text and photographs) without prior written permission. Please ASK first at shncjj@gmail.com. Kindly use comments section for any recipe clarifications and e-mails will not be entertained in this regard.
Zaarga - a destination for the most beautiful home, lifestyle and fashion accessories by Indian Designers. Buy this 'Banana Leaf Bowl' by Tejas Soni at Zaarga.
Warning: Busy browsers and visitors may scroll wayyyy down to read the recipes! :)
In my last post, I shared with you all the unusual and unlikely thing I have done in the name of blogging was to check-out a couple of cookbooks on one of my visits to the library here; for those who are in the habit of collecting cook books, this might not seem strange at all, but in my case, that was quite an extra-ordinary, one time, non –recurring incident. But let me ask you, have you done any “adventurous” things in the name of blogging? I DID ! I sent my brother–in-law, R, on a mission to shoot some pictures of Kerala’s Kallu Shappu/Toddy Shop and while capturing those quintessential white boards with letters painted in black, he got interrogated by a couple of locals thinking that he is a representative from some higher authorities, and on a duty to find out some irregularities in the functioning of that particular Kallu Shappu/Toddy Shop !!!!! Can you imagine my embarrassment in front of my in-laws and relatives, had he been “pampered” (euphemism for beaten-up) by those locals??? I was lucky and so was my BIL :) Here’s some pictures of Toddy Shop, my BIL took for me :)
If anyone is wondering why I am talking about toddy shops and what exactly is toddy, let me clear it up for you; As Scotch Whiskey is to Scotland, Toddy/ Kallu is Kerala’s very own “organic” alcoholic beverage; a sap collected, through an indigenous technique, from incising the flower clusters of a coconut tree and then fermented to produce the liquor. When we used to visit my father’s house for a vacation, I remember the tapper, Gopalakrishnan Chettan, coming on his bi-cycle, wearing only a Thorthu Mundu, a thin cotton towel, and a Chettu Kathi, a rectangular knife/blade, inserted to the belt around his wait……After sharing a light moment with my grandfather who used to sit in the Verandah, our tapper used to head towards the coconut trees assigned particularly for tapping….for us kids, the distinction between a regular coconut tree and the ones assigned for tapping, was mainly from the 10-15 dried half coconut husks tied to the trunk of tree, to form a natural ladder, enabling the tapper to climb the tree effortlessly on a daily basis…….After climbing up to the top part of trunk, he emptied the sap collected in Mann-kudam, a clay pot, to another container made off a dried bottle guard skin, and gingerly hung it on his belt …..Sometimes, we used to see him tapping with an animal bone, in the shape of a mallet, producing a very rhythmic,”tak, tak…tak.. tak..tak…..” sound, preparing the tree to produce sap. And the best part was when my father and uncles approached him to have a taste of the fresh toddy as it was quite sweet and though the tapper was supposed to take the sap directly to the toddy shop, he used to make some extra pocket money by selling it to my uncle, who had to share it with my aunts, not for drinking ofcourse, but to make Kallappam, a pancake made of rice flour fermented with a very small amount of toddy, and it used to taste yummy. The fresh toddy tastes sweet immediately after collecting but once fermented it tastes sour and hence Madhura –Kallu /Sweet toddy is very much sought after and there are some who prefer sour ones as well.
Modernization seems to have influenced the look and the ambiance of today’s Kallu Shappu/Toddy Shops of Kerala. My father and my uncles recollect the pictures of some thatched huts with small rooms furnished with simple wooden tables and benches and Kallu/Toddy was served in small Mann-paathram, a clay pot by Shappu-in-charge who generally has a big tummy……it is a place synonymous with simplicity…..simple rural people enjoying a heady evening with some lip-smacking food and when the intoxication reaches its zenith, people start singing some Naadan-paatukal (country-songs, if translated literally) or some start reciting poetry itself…..an atmosphere of friendship and simplicity……but if I ask CJJ or my brother, or any of my boy friends of my age, they do not talk of such thatched huts anymore….they talk about some brick and mortar shops, situated on some lakeshore where the Have’s and Have-Nots share the ground equally. Take a look at the lakeshore kallu Shappu/toddy Shop, CJJ and my brother visited last time we went home…..also check out the range of the vehicles !
But one thing that my father’s generation and the current generation agree unanimously is the exclusive taste of the food served in Kallu Shappu/Toddy Shop……there are many locals and tourists who visit the toddy shops, just to buy a parcel of the food. The menu ranges from the classic combo, Kappa and Meen curry (mashed tapioca & fish curry), crab curry, kakka erachi (Mussels fry), Karimeen Porichathu (Fried pearl spots) , Boiled Yam etc….When CJJ and my brother visited this lakeshore toddy shop, they brought home some Shappu delicacies like Meen curry (Fish Curry), crab curry and a bottle of toddy, for me to taste…..Those dishes were hot and spicy and at the same time delectable too ; toddy tasted sweet in the beginning and I managed to have ¼ cup or so but when I tasted the same in the evening, after fermentation, the sourness of the drink elicited strange expressions on my face which is not there even in the Navarasas !!! I think, it is more of an acquired taste! Nonetheless, I do recommend all those visiting Kerala to have a taste of the Toddy Shop delicacies and depending on the tolerance of your taste-buds, enjoy the local drink for a local flavour :) The only worst part is that women are not very much entertained in these Toddy Shops as this is predominantly a hangout area for the men and if at all the feminism in you forces you to go inside, be ready to receive stares from many inside! So the best option is to send the guy in your group :)
Here are some pictures from the Lakeshore toddy-shop. Toddy is the white drink in the bottle.
Tired of reading the long story ?? :) Lets go to recipes now …hmmm….I see many taking a deep breath there :P As I already wrote, Kappa Puzhukku, semi-mashed Tapioca/Yucca root seasoned with ground coconut mixture & Meen Curry, Curried Fish are Toddy shop specialties and they are a match made in heaven for sure. I learnt this fish curry recipe, a Kuttanadan preparation, from CJJ’s grandma. I have already blogged two of her very popular and tasty recipes, Pepper Fish Fry and Chicken Roast.
Kappa Puzhukku (Semi-Mashed Tapioca/Yucca root seasoned with ground coconut mixture)
Ingredients:
2 medium size Kappa/Tapioca washed, peeled and chopped into small cubes ( Click here for a pictorial on how to clean Kappa/Tapioca)
½ to ¾ cup grated coconut
4 small green chilies finely chopped
1 small red pearl onion/shallots finely chopped
¼ tsp + ¼ tsp tsp turmeric
Salt to taste
1 tbsp Oil, preferably coconut oil
½ tsp mustard seeds
3-4 dry red chilies
1 sprig curry leaves
Directions:
Wash the cubed pieces thoroughly in cold water; fill a large saucepan with water enough to cover the Kappa/Tapioca and bring to a boil. When it boils, drain the water and fill the pan again with cold water (just enough to get cooked) and add salt and turmeric and cook until the kappa/tapioca is soft, when pierced with a fork/knife.
Meanwhile, prepare the ground coconut mixture. Crush and blend the grated coconut well with finely chopped small onion, green chilies, turmeric powder and a tinge of salt (do not add more salt here as you have already added while boiling the root veggie), using your hands OR a mortar-pestle set OR put all the ingredients in a small food processor and pulse 1-2 times.
When the Kappa/Tapioca is soft and water is evaporated well, add the grated coconut mixture to this and combine thoroughly, breaking the Kappa/Tapioca cubes with a wooden spatula, to get a semi-mashed Kappa/Yucca and cook for not more than 2 minutes. Do a taste-test here and adjust the salt. In another pan, heat oil and when steaming hot, splutter mustard seeds, dry chilies and curry leaves and pour everything to the semi-mashed Kappa/Yucca and stir well to combine. Serve with Fish curry. (Recipe Follows)
5-7 slices of cleaned fish (Seer fish, King Fish, Spanish Mackerel, Tilapia)
6-7 small red pearl onions/shallots, thinly sliced
4 small green chilies slit opened lengthwise
4 whole, medium size, garlic cloves
1 small piece of ginger (approx.1 tbsp ), julienned
2 -3 sprig curry leaves
½ tsp fenugreek/uluva powdered
2-3 small pieces of Kudam-puli (Gamboge)
2 ½ tsp red chilly powder * (Adjust according to your tolerance level)
¼ tsp turmeric powder
2tbsp Oil, preferably coconut oil
Salt to taste
1 + ¼ cup water
Directions:
Before starting the preparation and chopping the onions and chilies, soak the Kudam-Puli/Gamboge in ¼ cup water, especially if it’s a store-bought one. The home made ones are generally soft and moist and can add directly to the curry after washing in some cold water. Make 1-2 slits on the fish to absorb the flavours. You will not see that in my picture as I forgot to make slits on mine :D
Heat oil, preferably in a ‘curry-chatti’, an earthenware from Kerala or a cooking pan; when the oil is medium hot, throw in curry leaves, snipped off of its stem, and smear the entire ‘curry chatti’ with oil and curry leaves, so as to coat the cooking ware fully with the combined flavour and aroma of the oil and curry leaves; DO NOT skip this step. Next, add the thinly sliced small onions, ginger, green chilies and whole garlic (Do not chop garlic; make 1-2 small slits on ‘em to absorb the flavours) sauté until transparent, in low flame. Add turmeric powder and red chilly powder and combine well and let it cook for 1-2 minutes or until the raw smell goes, in low flame itself. At this stage add powdered fenugreek and coat well with the other ingredients and then pour soaked kudam-puli, along with its water plus one more cup, or just enough to cover all the fish pieces and add salt and bring to boil, in medium heat. When it is boiling check the sourness and adjust by adding/removing one or two pieces of Kudam-puli/Gamboge.
Place fish pieces to this and cover with a lid and allow it to cook in medium heat; open the lid once in a while and let the steam out and swirl the cooking vessel; avoid stirring as you may end up breaking the fish pieces. Once the fish is cooked, lower the flame and cook for another 5 mts without the lid, until the gravy thickens a bit. Just 1-2 minutes before turning off the stove, take some oil in your palm and crush some curry leaves with oil and add it to the Fish curry, which accentuates the aroma, flavour and ‘the look’ of the dish. Turn off the stove and let it cool.
You may serve this dish after 30-40 mts, nevertheless, for best results, keep the cookware covered in the room temperature atleast for 4-5 hours, for all the flavours to set in and penetrate into the fish.
Note: In many of the households in central Kerala, this type of fish curry is prepared the previous night and kept overnight at room temperature, allowing it to set in all the flavours and spices, to serve for lunch. Fish curry prepared in ‘curry-chatti’ has an incomparable taste that the stainless steel or non-stick pan cannot achieve. Please do not substitute small onions with big onion as it definitely alters the taste and a generous use of curry leaves is suggested for a fresh and wonderful aroma. Also the taste will not be the same if kudam-puli/Gamboge is replaced with the tamarind used in Sambar and Rasam. Do not throw away the whole garlic in the curry as they turn succulent and taste awesome with all the flavours soaked in. Beginners (to this particular dish) need to be cautious with the use of fenugreek powder and Kudam-puli /Gamboge, until one gets a hang of the right proportion. *The Red colour: The red chilly powder I get from the Indian store is hot and at the same time, gives a fiery red colour too. But not all the brands produce the same colour; in which case, you may also add a bit of Kashmiri Chilly powder/ Paprika/ Piriyan Mulaku Powder. I am not in a position to note the exact amount to be used, as I do not use them at all.
Also known as Meen Mulakittathu, Meen Vattichathu, Red Fish curry, this fish curry is made without coconut milk and it’s actually poetry in red chilly powder and Kudam-Puli/Gamboge infused with the intense and unique flavour of coconut oil and the wonderful aroma of curry leaves. This goes to Jihva for Ingredients (JFI) at Saffron Trail.
Middle-Eastern food…..mouthwatering pastries…..live Arabic music…..belly dancing performances and Dabke dancers…….cultural and religious artifacts and cooking demonstrations…….a bit of cultural exposure, that sums up pretty much how we started our last weekend! We have been looking forward to our annual Middle-Eastern Festival and this time, I carried my camera too, thinking that I will capture some sights and share the flavour virtually with you all but the moment we reached there, I saw myself transforming into a personification of gluttony, walking around with two legs and hands and a single mouth, raiding the food stalls with inexplicable greed and gluttony! Based on my previous experiences, this time I knew exactly what to gobble up…we started our Mezas (Appetizers) with Baked Kibbee (beef and wheat mix layered with meat, onions and pine nuts), Meat Fatayer (yeast dough pie stuffed with meat, Grape leaves stuffed with beef and rice and Falafel (chick-pea and fava bean patties) with Hummous (Chickpea dip with tahini, lemon juice and garlic). Though we had the option to try out the vegetarian Mezas, we were more keen on trying out Shawarma (marinated grilled chicken), Beef Gyros and our favourite Kafta (lamb and beef mixed with parsley and spices). After stuffing ourselves with so much of food, I could not leave the place without having a bite of my favourite dessert, Galaktoburiko (custard phyllo pastry). The thought that this festival is an annual affair and I will get to enjoy all this food only next year, made me go for one more piece of the same dessert :) We also bought some Baklawa (layers of phyllo dough filled with crushed pistachios), Bird Nest (something similar to baklawa but in a different shape) and Burma (shredded wheat filled with pistachios) to munch on later. Watching the dabke dancers stomping and jumping and kicking their feet in rhythm …….. belly dancers shimming the shoulders and shaking the hip to the music in the air and the jiggling of coins from their hip belt……devouring the succulent main dishes and lip smacking sweet treats, it was definitely an evening worth all the wait :)
Did I stir-up your appetite with the listing of all the food I had? :) I have something for you, the classic middle –eastern bread, Khoubis Arabi/Pita Bread and a refreshing and filling Yogurt – Cucumber Salad/Mast Va Khiar, an appetizer that can be scooped up with bread. Both the recipes are taken from “Secrets of Cooking – Armenian/Lebanese/Persian” by Linda Chirinian. I have also tried Hummous Bi Tahini (Chick-pea and sesame seed puree) and Falafel (bean croquettes) from the same book which came out quite well. Sometime back, Sra posed a very simple yet thought provoking question,” what unlikely things have you done for your blog?”. Out of the many interesting comments that popped up, my immediate response was to declare that I had tried out many new dishes which I would not have, if not for blogging, but later it struck me that I did a very “unlikely as well as unusual” thing which was to pick some cookbooks on one of my visits to the library!! Though I just flipped the pages, and enjoyed the beauty of those pictures and returned the books without even reading, that was so unusual of me to do something like that…till then I never knew where the cookbook section was : P This was a one time, non-recurring event as well !
KHOUBIS ARABI- Pita Bread
Ingredients:
1 cup whole wheat flour PLUS 3 ½ cups All-purpose flour (Maida)
A ¼ oz packet of dry yeast OR 1tbsp dry yeast
1 ½ cups warm water
1tbsp sugar
¾ tbsp salt
3tbsp vegetable oil
Directions:
Mix yeast with 1 ½ cups warm water and 1 tbsp sugar thoroughly and proof for 10 minutes, till it is foamy on top.
Making the dough: In a large bowl, add wheat flour, all-purpose flour (maida) and salt and combine well. To this add the yeast mixture and 2 tbsp oil and mix the dry ingredients with the wet ones until liquids are absorbed. At this stage, add the rest of the oil (1 tbsp) and knead well till the dough forms a ball. You may use food processor to knead the dough. Grease your hands with some oil and rub the dough with your palms and place this in a lightly oiled large glass or porcelain bowl and cover with a plastic wrap and set aside for about 2 hours until the dough doubles in quantity.
Preheat oven to 500F.
Trick to get perfect pita pockets: After about 2 hours when the dough doubles in quantity, punch down the dough and deflate the air inside and let it rest for 5 minutes and then divide the dough into 6-8 pieces. Taking one piece at a time, flatten and bring the sides folding over towards the center as though you re wrapping a package and seal together all the sides, by gently pressing at the center. Turn the sealed side down and place on a lightly floured surface and cover with flour dusted plastic wrap and again let it rest for 10 minutes. Roll each ball into a flat circle and place on ungreased baking sheets and bake for around 4-5 minutes, until it puffs up and slightly turns golden colored. Cool slightly on racks and store in plastic bag while it is still warm, otherwise bread tends to dry out.
Tricks I learnt: This was my second attempt at making Pita Bread/Khoubis Arabi and it was 100% successful….all my rolled breads puffed up quite well, forming perfect pita pockets; but that was not the case first time when I tried, only 4-5 puffed up well and the rest got over cooked as I waited till it turned golden brown and some did not puff up on time. So, the basic rule here is to wait only till it puffs up well and changes the colour lightly.....don’t wait until it turns fully golden because the bread will not be soft at all; even if it does not puff up, if you see the bread changing its colour, immediately remove from the oven as the bread is cooked well even if it does not puff up, but it will not be as soft as the puffed up ones. Also, you should knead the dough several times and roll evenly to get pita pockets. Another important thing to be noted is that the dough should be moist. Don’t be stingy while adding the oil; 3 tbsp oil is a definite requirement. The oven temperature is also a vital aspect and cooking time varies depending on the oven settings. Though the original recipe calls for 6-8 minutes of cooking, my oven takes only about 5 minutes to do the job. So, it is advisable to start baking one rolled dough at a time, check the accurate baking time for puffing up and once it’s cooled, see if it is cooked enough and once you have an idea about the exact baking time required, you can keep 2-3 at a time and bake. This is as simple/difficult as making home made pizza dough or Naan (Indian bread) at home. Something that you can perfect by practice. Check out Jugalbandi’s whole-wheat pita bread too.
My home grown mint ..
MAST VA KHIAR - Yogurt Cucumber Salad
Ingredients:
4 cups yogurt
2 cups thinly diced cucumbers
¼ cup chopped fresh mint leaves OR 1tbsp dried crushed mint
¼ to ½ cup scallions (Green/Spring onions) chopped
¼ to ½ cup seedless raisins (preferably dark raisins)
Salt & white pepper to taste
Directions:
Pour yogurt in a cheese-cloth or a thin kitchen napkin and place in a colander or a bowl and drain for 1 hour.
Mix yogurt, cucumbers, mint, salt, pepper and scallions. Stir in raisins just before serving, as it gives out colour if soaked in yogurt for a long time and garnish with diced cucumber or mint leaf or scallions.
You can serve Mast Va Khiar/Yogurt cucumber salad as a dip for pita wedges and for those who like to double dip, serve them in individual cucumber boats to lighten up the atmosphere. To make cucumber boats: Cut the cucumber into desired length and halve them vertically and scoop out the seeds and mushy parts and fill it with the dip.
Hi All…..Thanks for checking on me ! I am very much in good spirits…Last week, my brain sent a request for vacation days off and could not deny since ‘she’ has been doing a good job so far :) Currently ‘she’ is chilling out, and ‘she’ will be back by beginning of next week :)
Well, I have given an update on my last post, Hot Crostini and one on Fish Curry-Central Kerala Style, as many have been asking for the pictures of Kudam Puli/Gamboge. I have uploaded a pic, followed by a small note on the same. Please check both.
On another note, ever wondered how they manage to get that “cheese pull” shot on a pizza, or a juicy steak, or a well groomed burger with its lettuce leaf and tomato slices looking like neatly stacked up books? Here’s some ‘interesting’ links I came across recently……..though one cannot make any judgements based on these links or generalize the information, it’s definitely worth for a light read : P
Let me start by sharing a very cute video……..am sure it will lighten up your mood :)
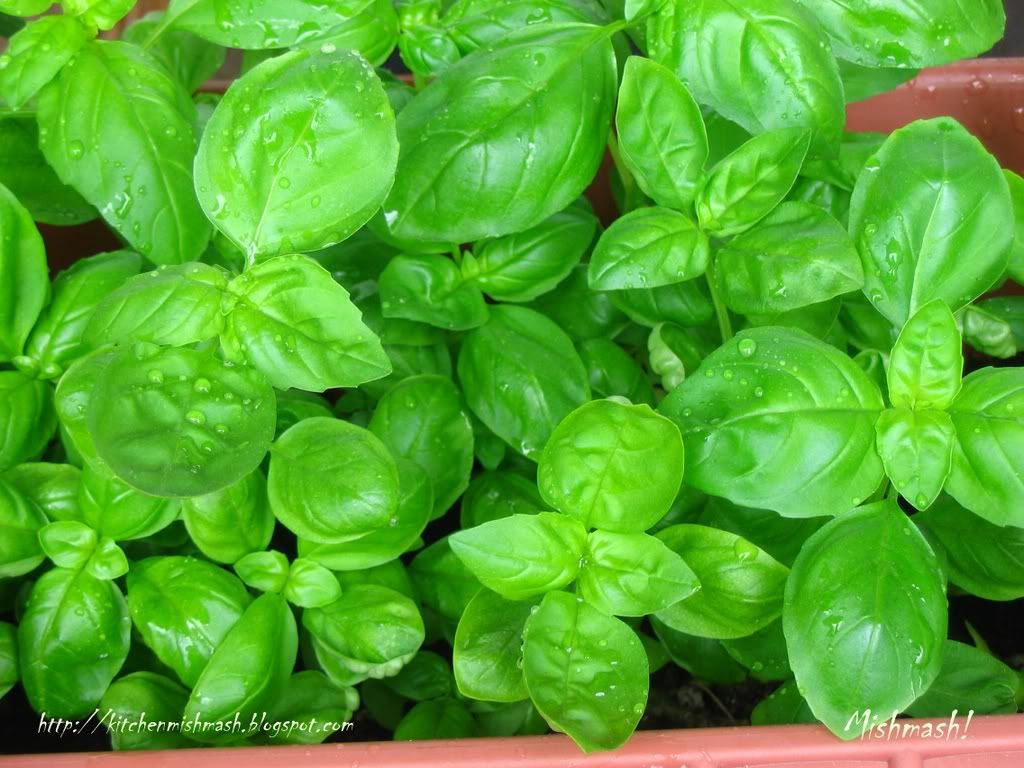
Before I got familiarized with the food blogging community and before I realized that a herb garden is possible in our balcony, which is as big as a hand kerchief, I had some ‘Green Friends’ at home…..10 pots of some indoor plants and some converted outdoor plants….and some marigolds planted on the ground in front of our house, for which I had to get permission from our Leasing office, so CJJ who loves to see fresh blossoms when he opens the front door, gets a pleasant and refreshing view everyday ! I poured all my love and care on our green friends……caressed ‘em…..watered ‘em…..sometimes I spoke to ‘em when nobody was around….they brought life and positive energy to our home. I was quite happy with my green friends but the moment I entered the world of food blogs and learnt that herb garden is possible in our matchbox apartments, I got into the clutches of greediness…the thought that I need not spent $3 and some cents on a small bunch of basil or mint, perhaps to use only 1-2 sprigs and then store them in refrigerator, to see the inevitable wilted leaves after a week or two …so this time when the Spring started, I was quite excited and under the guidance of RP and Shaheen who gave me lots of tips on seeds and seedlings, soil and containers, I started out with a small batch of mint, sweet basil, cilantro, parsley, oregano, rosemary, and chilies…..though very few showed some resistance, I am quite happy with my herb garden now…..A corner of my balcony is all green now…..my small beautiful green forest :) So, thought the best way to show off would be with this Sweet Basil plant and an Italian appetizer made with basil chiffonades.
My homegrown Sweet Basil Plant in a window-box.
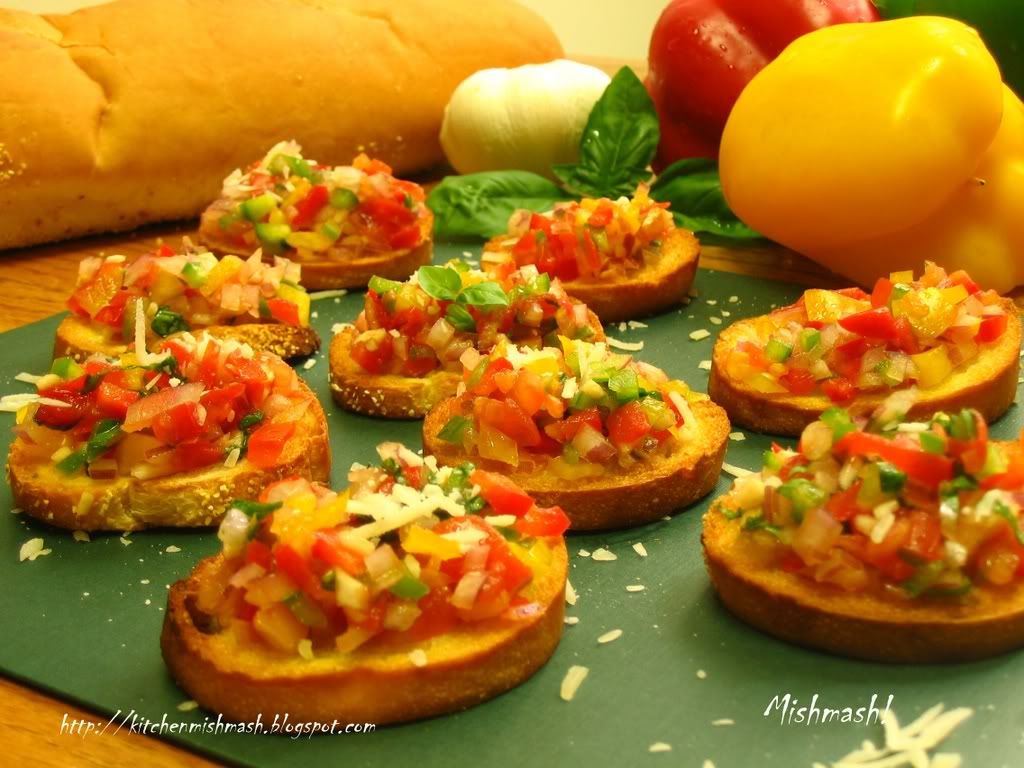
Almost an year ago, when me and CJJ were lazing around, on a Saturday morning, lying down and struggling hard to accommodate both of us in a single couch and while browsing through the channels aimlessly, we chanced upon a cooking show, America’s Test Kitchen, and this particular recipe, Hot Crostini, evoked my interest mainly because of all that rich colour and the freshness and evidently, the fact that it can be prepared in less than 10 minutes! Crostini, means ‘little toasts’ in Italian. They are “small thin slices of toasted French bread, drizzled with olive oil and topped with a few simple ingredients and served as appetizers”. Easy to make, especially for your last minute parties!
Ingredients for Hot Crostini:-
Half loaf of French Baguette Bread
1/4 cup red onion minced
1 medium size tomato
1/8 cup green bell pepper (Capsicum)finely chopped
1/8 cup red bell pepper finely chopped
1/8 cup yellow bell pepper finely chopped
1/2tbsp garlic minced + 1 whole garlic
6 basil leaves roughly chopped
¾ tbsp extra-virgin Olive oil + more for brushing the bread slices
1/2tbsp red wine
Salt to taste
1/8 cup grated cheese of your choice (optional)
Directions:-
Halve the tomato and squeeze out all its watery pulp and seeds; finely chop the cleaned tomato and mix with finely chopped onion, tri-colour bell peppers, garlic and basil chiffonades. Add olive oil and red wine and season it with salt. Mix well, cover and let this stand in the room temperature for 30 minutes, allowing all the flavours to set in.
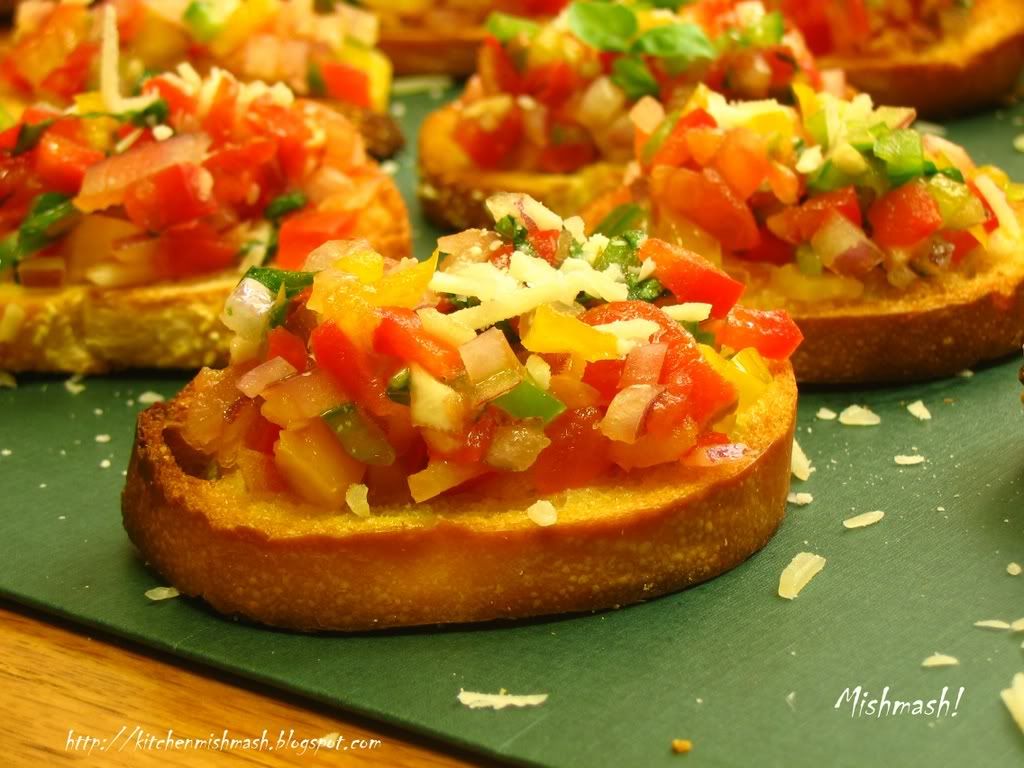
Preheat the oven to 450F. Cut the baguette bread into ½ inch coin shapes or small circles. Brush some olive oil and toast in the oven for 3-4 minutes or until they turn golden brown and crisp. Halve the whole garlic and rub lightly onto the toasted slices, to get the flavour and aroma of garlic bread. Spoon some mixture onto these garlicky crispy breads and garnish with some Parmesan or Mozzarella or any cheese of your choice. Serve with wine and sorriso*
Don’t you think it’s really a Palette on palate and Freshness in a Bite?
Note: Make sure that the pulp and seeds are squeezed out thoroughly from the tomato and there is no water content as that will result in a watery mixture. Since baguette bread was not available in our store this time, I used mini French bread which worked quite well. This goes to Green Blog Project - Summer 2007 hosted at Letzcook.
I have already blogged a recipe for Tomato Bruschetta, another Italian appetizer which is similar to Crostini…..though I really could not understand the difference between Bruschetta and Crostini in concrete terms, these links, here & here, throw some lights to clear up the confusion. Nevertheless, I would really appreciate if any of my Italian fellow bloggers or Italian readers, if any, could come up and help us distinguish between Crostini and Bruschetta!!!.
* Sorriso is Italian for Smile :)
UPDATE : Here’s an excerpt from the mail I received from Susan of Food Blogga, an Italian American from Rhode Island, currently residing at California. She was the best authentic source I could catch hold of from my contacts : “Though I am not an expert in Italian cuisine, here is my best response. In Rhode Island (where we have a large Italian population) bruschetta always referred to toasted bread topped with garlic, olive oil, and fresh tomatoes. Crostini was what we called toasted bread that had toppings other than tomatoes. So, here's my personal explanation of the difference between bruschetta and crostini: Bruschetta usually refers to bread that is toasted (over a wood fire or a grill or a skillet) then rubbed with fresh garlic, drizzled with olive oil, and topped with fresh tomatoes, basil, salt & pepper.Crostini typically refers to bread that is brushed with olive oil first then toasted. Unlike bruschetta, crostini is served with various toppings, such as beans, eggplant, or roasted peppers. “
“A watermelon was once thrown at Roman Governor Demosthenes during a political debate. Placing the watermelon upon his head, he thanked the thrower for providing him with a helmet to wear as he fought Philip of Macedonia” (Source)
For many of us from India, the thought of watermelon may perhaps bring back the memory of a familiar sight…….during the summer season, truck-loads of watermelon floods the nook and corner of every streets…..Watermelons mounded on pavements and highway road-sides, and the seller sitting there under a black umbrella, tied to his wooden chair to escape the blistering sun…..and sometimes talking to the nearby fruit stall guy or enjoying a light moment with the tender-coconut vendor :) Sometimes the vendor’s creativity can be seen when he tries to carve flower petals on the edges of the halved melon or when they display halved watermelons, showing its red succulent fruity part, pulling those waiting at the bus-stop and the passers-by to grab one of those summer fruits! Watermelon juice is another temptation to the pedestrians in that scorching heat.
As kids we used to eat the melon as it is, sucking the crescent slice and its juice dripping all over our clothes….and I don’t know , probably that is one of the reasons why I was never a great fan of watermelons and sometimes I feel its too bland and watery! But this Melony Mocktail did capture my attention and it was my friend, SM who shared the recipe with me, almost two years back…Whether to make a Mocktail or Cocktail, that is purely your choice :)
Melony Mocktail: Make puree from de-seeded watermelon chunks and freeze the puree in ice trays. In a glass, pour some freshly squeezed orange juice and some Sprite or Mountain Dew or any similar soda and throw in some frozen watermelon cubes too and you are ready with your mocktail. If the orange juice is too sour, then add some sugar to the orange juice. There is no hard and fast rule to make this drink. The taste of the drink really starts evolving when the pureed-melon cubes starts to dilute. Add less orange juice and more of soda.
Melony Cocktail: Follow the same method above and add Vodka. Please make sure that orange juice is not too sour.
Just when I was about to finish my photo session, another idea struck me. How do you keep the pureed-melon cubes frozen, when served to a group at a dinner or party? Citric/herbal/floral ice bowl comes to your rescue! Click here to learn to make your own ice bowls.
Well, now since you have hollowed out your melon, the next item in the agenda is probably to throw them into the trash can. Hold on! Create a beautiful and unique flower vase and use it as a centerpiece for your table.
To make the Flower Vase: Instead of using perfectly halved melons, it’s better to use melons that are cut off only ¼th from the top, to make the flower vase. Slice off a very thin piece, around ½ inches from the bottom so as to provide a flat base to the vase. Scoop out watery fruit fully and pat dry the interiors with a kitchen towel. Make your fresh flower arrangement in a glass jar or vase and place them inside the melon vase and you are all set to receive compliments from your guests :)
Here’s another fun-centerpiece idea which will be a great addition to your night-time, open air parties, Watermelon Lanterns! It’s Halloween in Summer!! :)
To make the Watermelon Lantern: Use melons that are cut off only ¼th from the top. Slice off around ½ inches from the bottom to provide a flat base. Using a pencil, draw the outlines of a smiley and darken the outlines using a marker. With a pairing knife, cut out eyes and mouth. Also clean up the interiors by scooping out the watery flesh of the fruit thoroughly and pat dry with a kitchen towel. Keep a small candle inside the melon and close it with the top portion, cut off earlier, which looks like a lid to your lantern. For more carving and fun ideas, click here.
Janelle of Talk of Tomatoes is the host and creator of the blog event, Centerpiece of the Month, an excellent idea to encourage the fellow bloggers to come up with novel and unique centerpieces every month and Watermelon Vase and Watermelon Lanterns are my contributions this month!
The entire post goes to the fruity blog event, AFAM, hosted at Jugalbandi for the month of July.


 Warning: Busy browsers and visitors may scroll wayyyy down to read the recipes! :)


 Tired of reading the long story ?? :) Lets go to recipes now …hmmm….I see many taking a deep breath there :P As I already wrote, Kappa Puzhukku, semi-mashed Tapioca/Yucca root seasoned with ground coconut mixture & Meen Curry, Curried Fish are Toddy shop specialties and they are a match made in heaven for sure. I learnt this fish curry recipe, a Kuttanadan preparation, from CJJ’s grandma. I have already blogged two of her very popular and tasty recipes, Pepper Fish Fry and Chicken Roast.