|
|
  For me the thought of Kuzhalappam takes me back to those days when I sneaked a peek into my grandma’s built in snack cabinet and reached out for those crispy tubular shaped snacks during those afternoons, when she was enjoying a nap after lunch and I had a craving to munch on something……it also takes me back to those days when my father took me to the bakery in our city to get our quota of pastries and sweets and me grabbing a packet of Kuzhalappam, at times dusted with sugar or lightly coated with sugar syrup. I also have vague memories of women selling stacks of Kuzhalappam packets wrapped neatly in clear plastic, at those densely crowded Ulsava Parambu/ festival grounds………
But when it comes to my mother’s generation, I learn that they associate this snack with a different set of memories. My mother’s recollections about this snack does not include a bakery or those stacks of crispy tubes wrapped neatly in plastic…….for her, it was part of festival fare- like Onam or Christmas ,when women in the family fry up a huge batch of Kuzhalappam or Achappam or some other traditional snacks, so they could feed their guests, distribute as gifts and also fill up large boxes to send it over, on their daughter’s return to her husband’s place……..it was also part of functions like Kalyanam/marriages where such homemade treats were served to guests on the eve of marriage/Kalyana Thalennu…………these crispy treats also made regular appearances at special occasions like ‘Vayaru Kaanal Chadangu’ , when a woman was pregnant and as the custom goes, her family visited on the seventh month of her pregnancy to bring her back to her house, from her husband’s place; on such occasions, an array of traditional snacks were prepared at the girl’s side, either by women folks in the family or by a specially appointed pachakakkaran/cook , to carry them along on their visit, and Kuzhalappam was one of the main items.
On one of those days when nostalgia hit the shores and craving for the taste and smell of home was at its high, I ventured out to try my hands on this old time favorite, without realizing that it requires certain skill, expertise and patience. Did I get the desired result? Well………
Well, you might notice some differences in terms of thickness and size between the fried ones and the ones in the pictorial below. The ones in the pictorial are from my first attempt last year around Christmas time and the fried ones are from our recent second attempt. I had my lucky stars smiling at me pleasantly on my first attempt, till the shaping part but everything took a sudden U –turn when I started frying them up. Not only did the fried ones failed to crisp up well, but they got browned quickly, forcing me to remove them from spitting hot oil. As always, , my mother ,my 911 for kitchen mishaps shared her words of wisdom listing out the causes for all mishaps, and Lesson No: 1 Learnt was: Heat needs to be adjusted often, allowing it to cook on its own and crisp up well; it is not as easy or quick as frying Pappadam !
Another challenge was that the tubular shaped ones started flattening out as though a flying saucer fell on it as soon as I dropped them in hot oil, giving me an end product that can be called Kuzhalappam without its typical ‘Kuzhal” or that tubular look. Lesson Learnt: There needs to be enough oil for the prepared dough tubes to get fully drenched in oil and as soon as you drop one. No skimping on oil.
The ones that showed resistance to flatten out and maintained a not-so-pathetic shape did not crisp up enough and had sogginess to it. Lesson Learnt: When the two edges of the circle are pulled together and folded to seal tightly, overlapping should not be more than ¼ inch as that part takes more time to cook and crisp up to perfection, compared to rest of the thinnest parts of the tube.
With the realisation that it was the shaping part and frying part that led to the catastrophe on my first attempt, conscious effort was made to take care of those areas but over confidence on the dough part forced me to blindly follow the same measurements for the rice flour- coconut milk proportion and the result was a bit disturbing; as the dough was rolled out and folded and shaped, it started tearing up a bit here and there and at that point , the bulb of enlightenment lit and Lesson 4 & 5 learnt: A very soft and smooth dough is mandatory to roll out thin flat discs and to get such a perfect consistency, it is best to know your rice flour well and depending on the nature/quality of flour, quantity of coconut milk should be adjusted ( increased or decreased); also it is to be made sure that dough does not dry up quickly, so always keep it covered, locking in the moisture coming from warm dough.
So, here’s how it finally turned out for us with all the above mentioned hits n misses and I am sharing the recipe we followed.
 Recipe Source: Aunt S from my paternal side. Recipe Source: Aunt S from my paternal side.Ingredients: - ¾ cup rice flour, lightly roasted and cooled
- ¾ to 1 cup coconut milk, medium consistency ( varies with rice flour quality)
- 1 tsp black sesame seeds/ellu
- ½ tsp cumin seeds/jeerakam
- 2 tsp small red pearl onion/Kunjulli, minced
- Salt to taste
- Oil for frying
Directions: - Heat medium consistency coconut milk and bring to a boil. To this add, salt and minced small onion and stir well; then add rice flour and mix everything with a wooden spoon and when everything is wet enough , add cumin seeds and sesame seeds, turn off the heat, cover with a lid and let it rest for about 10 minutes. When the dough is warm enough to touch, knead the dough gently until it gives a smooth and soft texture.
- Divide the dough into small balls and start rolling out one at a time, into flat thin rounds and using a cookie cutter or lid of a jar, cut them into a perfect circle. As shown in the picture, pull the edge from two sides, folding to place one on another (overlapping only about ¼ inch or so) and press down with your fingers and seal them tightly. Sprinkle some all purpose flour/ Maida while rolling out the dough to make the process easier. (Note: Back home, this is done on a cassava or banana stem ( kappa kuzhal/Vaazha-thandu), to get the tubular shape. You can use anything in a tubular shape but I find my alternative method easier, atleast it works well for me.)
- When you are done rolling out and making about 5-6 tubes, heat oil in a small wok/cheenachatti; when it is really hot, slide in one at a time, making sure that there is enough oil for the prepared dough tubes to get fully drenched in oil and as soon as you drop one, you see the oil bubbles multiplying . Adjust the heat to make sure that it doesn’t burn or brown immediately and has enough time and heat, to crisp up perfectly. Keep flipping the sides, until it is cooked well and when crisp, remove with a slotted spoon, drain on a paper towel; fry rest of them and when it is completely cooled, store in an airtight container. Repeat this process till you finish rolling out, shaping and frying the entire batch. (Note: You can fry 2-3 at a time, depending on the size of your wok and your expertise)
- Serve as a crispy treat with tea or coffee or just munch on them whenever you feel like.
Variation: If you want the sweeter version of it, you may coat it with sugar syrup, after frying, as diamond cuts are coated with sugar syrup. You may also dust it with some superfine sugar (after frying) to lend a mild sweetness to Kuzhalappam. I feel this sweetened version is a bakery innovation and not an old world discovery.
Hope you read through the mishaps mentioned in the introduction and take tips before venturing out to fry up a batch of these crispy treats. It takes practice and time to perfect these crispy tubes, so don’t be disheartened if it turns out flattened or burnt or soggy. Know your ingredients, polish your skills and master the technique, you are sure to get a taste of the old world.
Luv Shn
|
No part of the content ( articles, photographs, recipes) of this blog may be reproduced without my written permission.Copyright © 2007-2010 Kitchenmishmash.blogspot.com. All rights reserved.
|
Till the day I left home and homeland, Kerala food was what my mother cooked at home, what I ate from my relatives and friends’ houses and those roadside eateries, Thattukada and small scale restaurants. Even before I realised, I lost count of the large chunk of women and a small bunch of men out there who fired up the stove for me and spread out a sumptuous array of palate tickling home cooked meals, sautéed with warmth and sprinkled with love ….. never did I bother to find out the recipe nor did I care to understand how it tasted different from my mother’s preparation. For me, the only thing that mattered was the taste...the taste that delighted my taste buds and made me a slave to their dining tables…….the taste that made me go for one more round of Parippu Pradhaman, the taste that forced me to go for one more slice of Meen Varuthathu….the taste that coaxed me to go for that last piece of cake which compelled my lecturer to baptise me with the name aakrantham.com aka gluttony.com …………
After I got married and gained the courage to cook or discuss food with friends hailing from other parts of Kerala, I started having genuine doubts on the culinary legacy left behind by grandmas and great grandmas in my family mainly because there was always someone or the other to point out that “onion is never used in Avial” ……. “Kaalan has to be cooked with raw plantain and not ripe one or the consistency has to be thick and not the medium pouring consistency”…….”Paalappam has to be made from ground rice and coconut batter and not by mixing rice flour and coconut milk”…….the list was endless. Those people who maintained such claims seemed to be having their own perceptions (or misperceptions?) about how a particular Kerala dish should be. We, CJJ & I , were not saints either! As products with solid roots in the central part of Kerala, we had a disdain for all those who made Fish curry with Vaalan Puli/Sambar tamarind instead of Kudam Puli/gamboge. We considered it a sacrilege to add Vaalan Puli/Sambar tamarind in a fish curry, not realising that it is widely used in kitchens from the northern part of Kerala to make a fish curry.
This type of insistence on the actual list of ingredients or what is perceived to be the ‘authentic’ method of cooking left the rookie in me baffled each time doubting the culinary traditions of my family and questioning my mother whenever she passed me recipes as followed in her kitchen. For most of my “Are you sure that’s how it is generally done ‘coz they said they don’t add that for this preparation” type of questions , my mother tried to throw in some light into my head saying that “…I do it this way…but some people don’t…especially those from this area….” Without really using heavy jargons like regional variations in Kerala cuisine or local food habits or food preferences of an individual or a community, my family kept repeating that they follow a particular technique and at the same, the method followed at some of their friends’ places, coming from a different region in Kerala, was slightly different or fully unique.
Days and years passed by, regularly coming across such claims and arguments over professed way of cooking and I was almost at the brink of losing my sanity over what constitutes an ‘authentic’ preparation. Though I have traveled from one tip of Kerala to the other, it was never a culinary travel learning about the existing regional variations in cooking or food habits or exploring the virgin and undiscovered culinary pockets of Kerala. Yet a certain level of enlightenment and awareness came through some well written articles and blogs out there that helped me sort out some of my confusions about the subtle variations in cooking; they also helped me empty the brain clogged up with some of my own as well as forced upon set of assumptions and presumptions, and inevitably drew up my own conclusion that the word authentic is more like a cosmetic term marketed and glorified by a group of restaurant owners abroad to lure the expats and domestic resort owners that mushroomed during the tourism era to attract the tourists flocking to Kerala and it did confuse some of us atleast at some point in time and complicated things for us.
Along with that realization, I was slowly getting some explanation as to why a certain dish is cooked in a particular way in my household and why it is cooked differently in our friend’s place and why it is paired differently by individuals or communities. The day I read Mallugirl’s post on how her family devour Puttu with fish curry for breakfast, I was thrilled to prove to CJJ that I am not a weirdo as he could never swallow the sight of me relishing a plate of puttu mixed with fiery red fish curry!! On another occasion, I found immense joy when his maternal grandma scoffed at her own daughter and family who enjoyed Kappa Puzhukku and Meen Curry for lunch as the old woman could not digest the idea of serving this ever popular combo as lunch; for her it was a tea time special though she personally preferred to pair kappa with Mulaku Chammanthi. It was a perfect opportunity for me to point out to CJJ that it was not strange on my part to get surprised when I heard their lunch menu on one of my first visits to their place. The idiosyncrasies in terms of food habits that I found in CJJ’s family did not stop with that. They named my favourite evening snack Poruthal Ada - a flat rustic bread made of rice flour and grated coconut, wrapped in banana leaf parcels and roasted on a clay pot and served with sweetened coconut milk – as Orotti. Not only did I find the name weird but also found their habit of pairing it with a savory side dish, as a breakfast item, a bit crazy until I read Annita’ s post on Orotti and learnt that such a combo exists and is again a classic example of variations in food habits and preferences. What is strange and awkward for some could be normal and comfort to others !
Over the years, especially since I started food blogging I have been well aware of the markedly visible regional variations in cooking and food habits and hence it did not surprise me much when some of you commented on my previous post that my aunt’s version of Ottada is what they call Orotti and thought it is a good idea to showcase how Orotti is cooked at CJJ’s place. While discussing this topic with my mother, I was excited to learn that my maternal grandma made the same thing but she called it Rotti and served as a breakfast along with a savory side dish. Only after marrying my father, my mother discovered the pleasures of roasting this Ada/flat bread wrapped in a banana leaf and roasting on a mann-chatti/clay pot, from my paternal side and they soaked the torn pieces of warm Ada in a pool of sweetened coconut milk and relished each spoonful with some of that sweetened coconut milk as an evening snack. Ever since she enjoyed the delights of that combo, she followed the same method and serving style whenever she cooked the same for her kids.
Some subtle variations in cooking method…….some differences in eating habits and pairing of food……..yet multiple names for something that’s made from the same set of ingredients. Interesting and dynamic, isn’t t?
Here’s the recipe for Orotti/Rotti Ingredients: ( Makes about 3-4 breads )
 - 2 cups roasted rice flour (pachari/raw rice)
- 1 cup freshly grated coconut
- Salt to taste
- 2 ¼ to 2 ½ cup hot boiling water ( varies as per rice flour)
- Non stick or cast iron griddle
Directions: - Make the dough by first mixing rice flour and salt; to this add the boiling hot water, just enough to make a soft and smooth dough; use a spoon to blend everything well and then add grated coconut and mix with the rice flour dough; when it is warm enough to touch, knead gently and make a smooth dough.
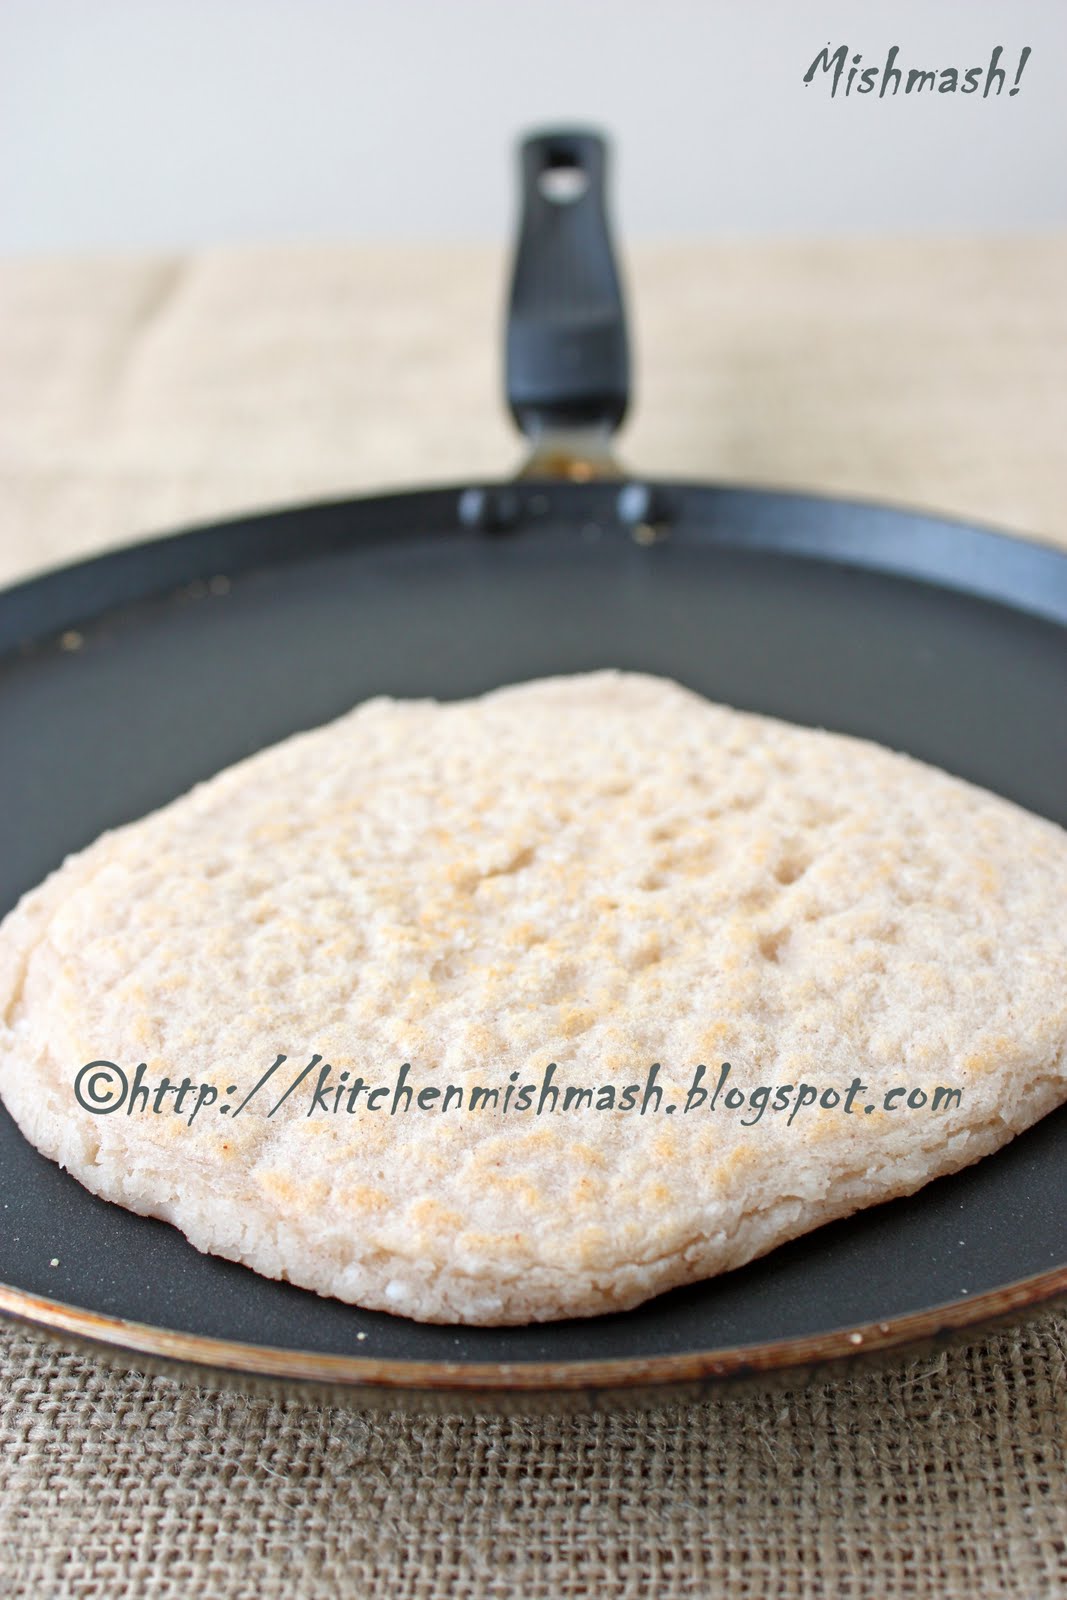
- Heat a cast iron or non –stick griddle and when it is really hot, pull out a handful of dough – as big as a grapefruit or a big mango – and roughly shape it into a round one; place the dough on the heated griddle and with your fingers, gently spread out the dough into a flat one, with around ¼ inch thickness or as the one in the picture; dipping your finger in little water will make the it easier for you to spread the dough. Now close the griddle with a lid and cook for about 2-3 minutes on high heat and then remove the lid and flip. Continue to close it with lid and keep flipping until both the sides are cooked/roasted well, with tiny golden brown spots here and there. The moisture that gets locked up inside when closed with a lid, help to retain a certain level of softness while roasting/cooking on the griddle.
- Serve as a breakfast with any savory dish. We served with some Kheema Masala, a delicious ground meat preparation with the perfect blend of spices and herbs.
 Poruthal Ada
Ingredients - Same as the ones for making Orotti/Rotti
- Banana/plantain leaves
- Mann-chatti/Shallow clay pot
- 1 ½ to 2 cups coconut milk, medium consistency
- 6-8 tbsp sugar or to taste
Directions: - Follow the same steps and measurements, given above for making Orotti/Rotti, to make the dough with rice flour and grated coconut.
- Heat the mann-chatti/clay pot .
- As the clay pot is getting heated, wash the banana leaves and pull out some dough and roughly shape into a round one; place it on the banana/plantain leaf flatten it using your fingers as in the picture; dipping your finger in little water will make the it easier for you to spread the dough. Fold the leaf from all the sides, wrapping and protecting the flattened dough and place it directly on the well heated mann-chatti/clay pot and cover with a lid, let it cook for about 5-10 mts; now flip the parcels, reduce the heat and let the other side cook; you will notice the banana leaves drying up and browning as Ada gets cooked/roasted. Flip both the sides one more time and cook for some more minutes until Ada is cooked/roasted well with charred spots here and there as in the pictures given above.
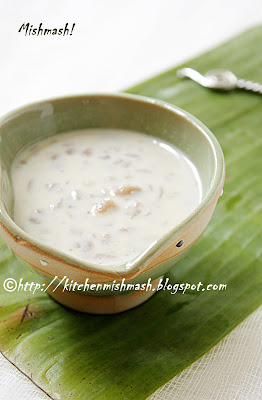
 To Serve: Discard the charred banana/plantain leaves ; remove any leftover burnt pieces of the leaf glued to roasted Ada. ( Note: Personally I am fine with tiny bits and pieces of burnt ones here and there on my Ada as I enjoy that flavor when soaked with coconut milk). When roasted Ada is still hot, tear then into bite size pieces or cut them using a food safe scissors and soak the pieces into coconut milk, sweetened with sugar. There should be enough coconut milk for all the pieces to get drenched and let it soak for about 30 minutes. Take enough individual portions and serve the soaked ones drenching in coconut milk as shown in the picture above.
Luv Shn
|
No part of the content ( articles, photographs, recipes) of this blog may be reproduced without my written permission.Copyright © 2007-2010 Kitchenmishmash.blogspot.com. All rights reserved.
|
Warning: Long Post.
....that charred smell of fresh banana leaves along with the tempting fragrance of rice flour dough and grated coconut roasting on a mann-chatti (clay pot).......
I wrote that line almost 20 minutes back and I am stuck there unable to capture the true essence of the I-R-R-E-S-I-S-T-I-B-L-E smell that wrapped me up when we cooked Ottada last week. I realise I do not possess the vocabulary to really translate the smell sensation I experienced through my words……….., it is something to be experienced…… something to be tasted.....and it is really difficult to capture the feeling in words and that's what I conclude especially when I go back and read a line from Nikhil Narayanan's mail ".......ottada in vazhaila, the cooking done on a dosa thatt.Trust mee,the taste of left over pieces of karinja vazha ila on them is :-) " That smiley says it all!
It all started almost a month ago on a late afternoon when I received a surprise mail from Nikhil saying, "Shn, I was searching for ottada and landed on this pdf. May be you can try this if u haven't written about Ottada already. http://krpcds.org/publication/downloads/62.pdf " As I finished reading his mail, my immediate reaction was "Isn't it same as Ela Ada with coconut and sugar filling and roasted on mannchatti , instead of steaming and why should I take the effort to blog about it just to showcase a different technique? ". But as I started browsing through the article , especially the "Cultural Heritage and Lifestyle" section that gave a very brief account of the local food habits of the people of Kalliasseri panchayat, Kannur district, Kerala, I realised one more time in my food blogging experience, the significance and existence of regional variations in food and food habits, even in the category of simple food.
In this work, the author, Mr.T.P Sreedhanan described Ottada as follows: “Rice is ground into paste. Coconut and jaggery are added. It is then pastened on the inner side of plantain leaf, folded, and placed on a cloth tied over the mouth of an earthen pot containing boiling water. The paste is boiled in steam into a delicacy.”
Well, that was completely different from my idea of Ottada I had gathered from my mother.I could feel my curiosity barometer rising minute by minute especially when a web search on "Ottada" threw results that were intriguing, conflicting and confusing at the same time. At that point in time I wished I was in Kerala , researching about Ottada, considering the number of variations the web search revealed!!! Yes, the curiosity barometer was really at its high point!
That's when I noticed a comment from Renu Ramanath on one of the blogs where she had written, "....making ada-s in manchatti sounds interesting. may be this is what we refer to as 'ottada,' as ada is otherwise prepared by steaming." Renu's blogs have always been of interest to me because of the trivia she provides on certain traditional food and customs that are becoming extinct and to an extent, her articles satiated my appetite to learn about the socio-cultural background of our traditional cuisine. Noticing that her idea of Ottada matched with the information I had gathered from my family, I contacted her that evening itself and she promptly replied to my mail saying , “well, i haven't exactly eaten 'ottada,' only heard about it. to my knowledge, it has the same batter as that of steamed ela ada, i mean, jaggery and coconut filling, in rice batter spread on the banana leaf. but, ottada is made by roasting in a chatti, or even by placing over embers, like pappadam. i'm sure it will haev a distinct flavour. even my google search revealed different recipes. i think the one i saw in the site called 'pachakam,' comes closer to my idea of 'ottada.'.
I wrote back to Nikhil with the information I had collected and the little piece of info my mother shared that Ottada was originally done in an “Ottu-paathram” and that’s how perhaps it got its name. Nikhil reverted to my mail confirming the same stories and later sent me a very value adding piece of info that “the ott in ottada refers to od(tile) and not brass“ Learning that Ottu –patthram that I had earlier perceived (wrongly ) to be a bell-metal griddle was being referred , in this context, to a mann-chatti made of clay, the same material used for making an old fashioned roof tile/’Odu used in Kerala- I was getting more clarity as to the general use of mann-chatti/clay pot for roasting this rice flour parcels filled with sweet fillings.
Meanwhile, I had also contacted my aunt and brother –in-law who hails from Kannur and my aunt shared the recipe followed in her family, with my mother. I must note that though from Kannur itself, my aunt’s recipe for Ottada and the one listed in Mr. T. P . Sreedharan’s article are entirely different except for the fact that in both these recipes rice is ground to a paste. I have given my aunt’s recipe with pictures towards the end of this post. I have also added a technique my maternal grandmother uses to get a slightly different/soft texture for Ottada. You can also find some links at the end of this post to have an idea about the regional variations. ** Before I move on to the recipe, let me write this point very clearly that neither me nor the people I have contacted are an authority on the subject to establish this as the original version or a particular regional style. None of us have done any research on this topic to have a final word on this dish or the variations available out there. This post is only an attempt to compile the information -coming under the category of hearsay- I have collected from here and there and hence please do forgive me if I am unknowingly making the blasphemy of putting out any misleading information here. Please DO correct me if I have generalised any data or given out any wrong information here.
Ottada : Recipe followed in my ancestral families
The texture of Ottada, rice flour parcels filled with sweetened grated coconut , flavored with a hint of cardamom is totally different from the steamed Ela Ada. Ottada is not as soft as the steamed ones; roasting gives it a slightly hard texture with distinct flavours of banana leaf and mann-chatti/clay pot and the charred spots add more to the taste. If you don’t havemann-chatti/clay pot, use a cast iron or non stick griddle and can attain the same effect while cooking but I must add that the flavor and aroma that a mann-chatti gives is beyond description.
Ingredeints: - 1 ½ cups rice flour, roasted
- 1- 1 ¾ cup hot boiling water ( varies depending on the rice flour; add just enough to make a soft dough)
- Salt to taste
- 1 ¼ cup freshly grated coconut
- ¼ cup sugar or to taste
- 6 cardamom, crushed ( adjust depending on the strength of cardamom)
- Banana leaves for wrapping
Directions: - Using your hands, blend sugar and crushed cardamom with freshly grated coconut.
- Make the rice flour dough by first mixing rice flour and salt; to this add the boiling hot water, just enough to make a soft and smooth dough; use a spoon to blend everything well and when it is warm enough to touch, knead gently and make the dough and divide them into 10 balls (Note: the dough should be looser than the chappathi/roti dough but as soft as the Idiayappam/string-hoppers dough)
- Take a piece of banana leaf in rectangular shape, as shown in the pictorial HERE; place one rice dough ball and flatten it gently; then with fingertips, stretch the dough onto the leaf, flattening it very thin . Dipping the finger in water, once in a while, will make this process easier, especially if the dough is a bit sticky or dry. Once the dough is stretched out, keep some sweet filling on one half and fold the other half and press the edges gently, making sure that it is sealed well, else the filling might come out.
- Heat a shallow mann-chatti/clay pot and when it is really hot, place 1-2 folded banana leaf parcels and let it cook for about 5-10 mts; now flip the parcels, reduce the heat and let the other side cook; you will notice the banana leaves drying up and browning and at this point you will be able to lift the banana leaf gently and see the Ada changing its colour as it gets cooked. Flip both the sides one more time and cook for some more minutes until Ada is cooked/roasted well with a golden shade on top , with charred spots here and there as in the pictures given above.
- Ottada can be served as either a snack or breakfast along with tea/coffee
Ottada: My maternal grandma’s method.
My maternal grandma had a technique to bring in the softness of steamed Ada in Ottada. She sprinkled some water on the banana leaf parcels, after placing them on mann-chatti/clay pot and then closed it with a lid. This helps to lock in some moisture and maintain a soft texture while roasting . There is no need to sprinkle water when you flip the third and fourth time. The pictures below will give you an idea about the same.
Ottada : My aunt’s family recipe from Kannur As I wrote in the introduction, though from Kannur itself, my aunt’s recipe for Ottada and the one listed in Mr. T. P . Sreedharan’s article are entirely different except for the fact that in both these recipes rice is ground to a paste. My aunt’s recipe for Ottada is more like rustic flat bread, roasted on a non stick or cast iron griddle. The taste of Kuthari and grated coconut gives that simple flavors of the old world.
Ingredients: - ¾ cup Kerala rosematta rice/Kuthari ,soaked overnight
- 1 cup freshly grated coconut
- Salt to taste
 Directions: - In a mixer, grind all the ingredients together into a thick paste, adding just enough water to operate the mixer to make a thick paste. The batter need not be as smooth and fine as that of dosa/idli batter; it should be thick,so you can spread with your hand.
- Heat a non-stick or cast iron griddle; pour one or two ladles of batter and using your hand, spread them gently on the griddle in a round shape. Cover with a lid and cook both the sides , by flipping three or four times , until Ada is cooked well and a golden hue appears on top. Those who prefer a bit more browned and charred spots on Ada, can continue to cook for some more time until you get the desired results.
Here’s some more variations available on the web for Ottada:
Before I call it a wrap, let me thank Renu for her prompt responses and helping me clear out some of my doubts ………..many thanks to my family especially my aunt and my mother who helped me with the recipes and instructions ……and a special thanks to Nikhil Narayanan for firing up my curiosity to explore this simple and tasty delicacy of the old world, to understand the existence of the numerous variations available for such a simple one which I would have overlooked , had he not mailed me in the first place………Thank YOU :)
UPDATE : Continuation of this post HERE with more on regional variations and food habits.
Luv Shn
|
No part of the content ( articles, photographs, recipes) of this blog may be reproduced without my written permission.Copyright © 2007-2010 Kitchenmishmash.blogspot.com. All rights reserved.
|
 There have been times in the past when a certain remark in the comment section sparks an idea for my next post... on one occasion it took me down the memory lane making me write about the simplest things from our kitchen and on another, it helped me rekindle the memories of my childhood and recreate the forgotten taste. This time, it is neither about a dish nor a recipe but to introduce a couple of old world techniques to some out there, who may not be aware of the same.
On my previous post, Small talk left a message saying," .........Just a tip : Taste can be enhanced and oil used can be reduced by wrapping fish in plantain leaf and griddling it on a tava and later shallow fryng it in oil....Doing this nt only seals on juices of the fish inside bt reduces oil used drastically....." .
Though I have been using a similar technique occasionally - especially those days when both of us found out that we have to keep a tab on our cholesterol levels - to reduce the quantity of oil while frying , it never occurred to me that I should make a post on it. But after reading her comment, especially the part about taste enhancement and reduction in the use of oil, I thought it is a good idea to bring this old world technique into the limelight. I started using this method about two years back as both of us could not appreciate the taste of baked fish and continued to crave for that pan fried fish and that's when my mother gave me this idea for frying the fish on fresh banana or plantain leaves.
The technique suggested by Small talk is a very healthy alternative and works well with fatty as well as non fatty fish. Our method is slightly different from the one Small Talk has mentioned. In her's you can control the oil to a large extent and yet get that oily crispy outer texture by pan frying in oil in the final phase after the initial steaming or roasting where the fish gets cooked in its fat and juice.
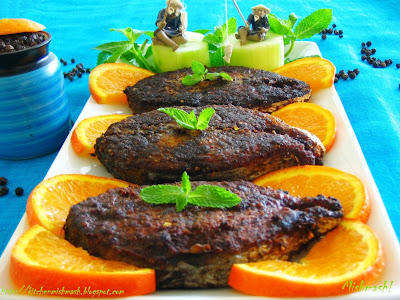
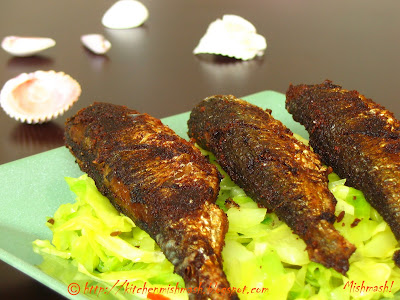
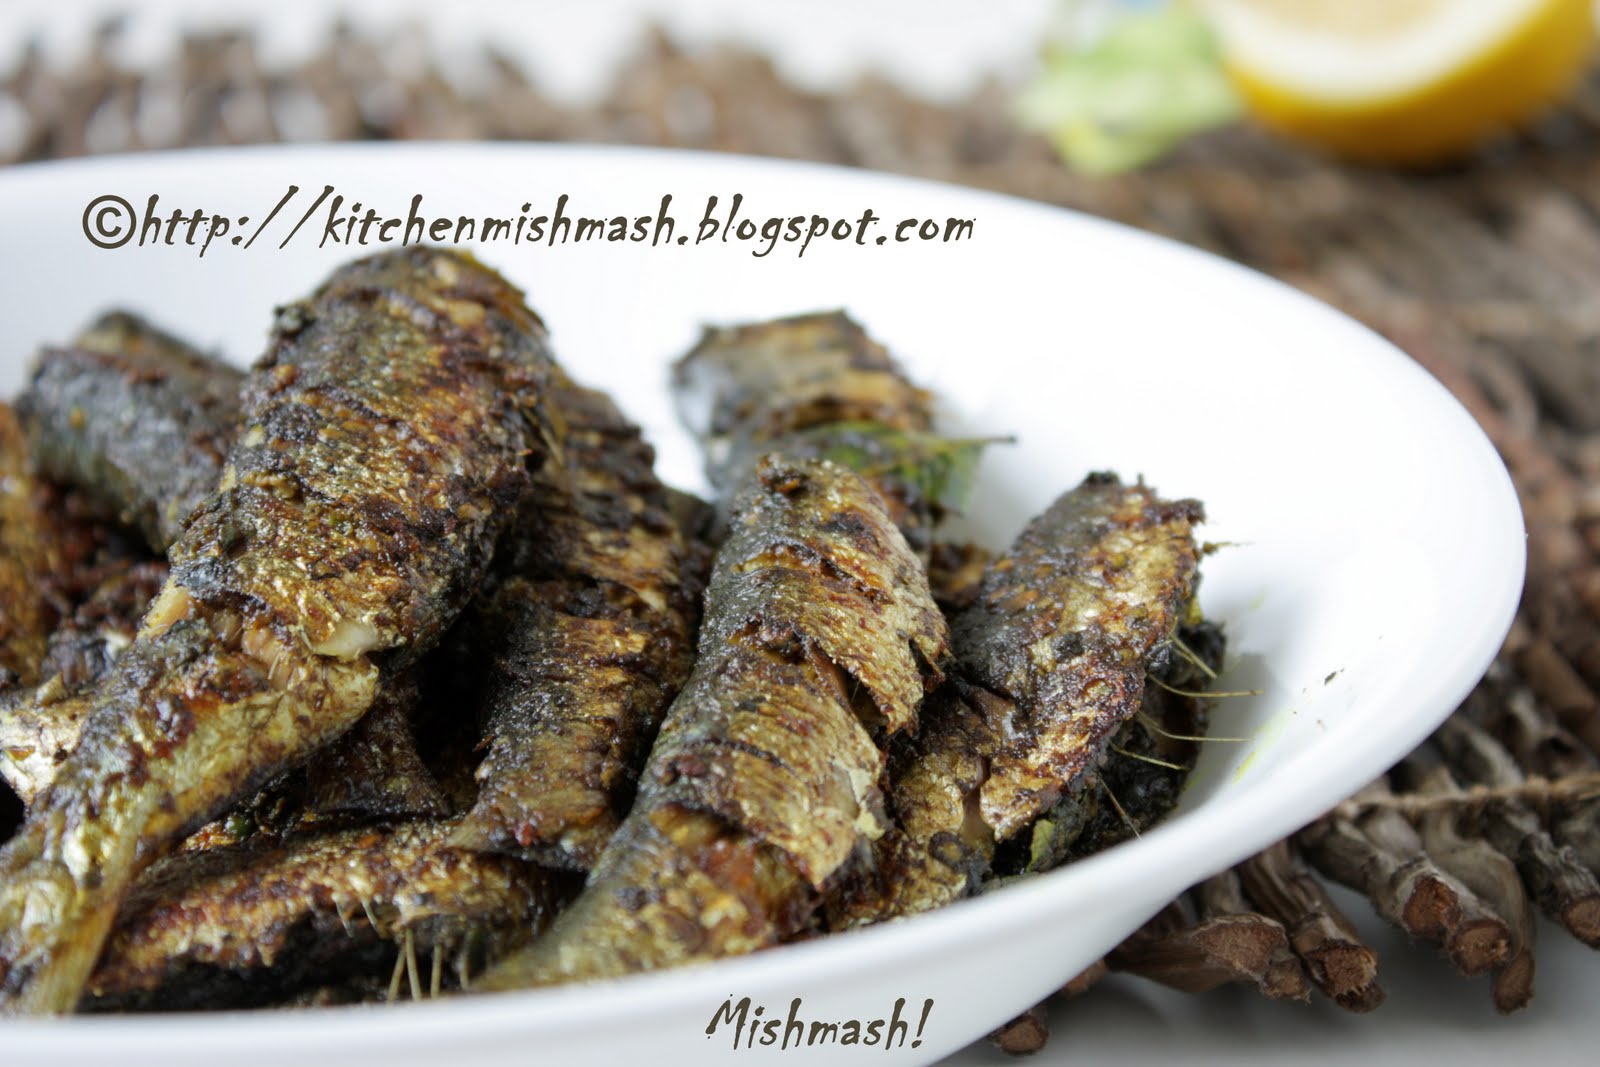
The method we follow is slightly different. We wilt the banana/plantain leaves on the heat for 2-3 seconds and then place the wilted leaf on a well heated cast iron or non stick griddle; then place the fish pieces on a single layer (not stacked); drizzle some cooking oil on fish pieces as well as the leaf and let it cook/fry in medium-high, with the lid covered, for about 3-4 minutes. Now reduce the heat to medium and when one side is cooked well, flip the fish and cook the other side. If you want a crispy exterior, you can flip one more time ( after both the sides cooked) and at this stage, remove the lid and let it cook /fry , until you get the crispy texture you aim for. Based on my experience, this method works well with fatty fish as fish releases its natural fat/oil, allowing us to use lesser quantity of oil. If you re using small variety of fish like sardines, then you need not close with lid while cooking; use lid only if it is a thick cut fish like king fish or Indian mackerel or salmon.
Both these techniques enhance the taste as the fresh banana/plantain leaf lends a subtle earthy flavour and aroma to the fried fish.
Prathibha of Rhythm of Life has shared another tasty alternative and that's by roasting the fish marinated with spice mixture and wrapped in banana/plantain leaves , on a bed of coal aka " kanal". It is an old world technique to bake fish but a very tasty alternative provided your kitchen has the place and potential to use coal :)
Small Talk & Rhythm of Life, Thanks a bunch for sharing such healthy and tasty cooking methods :)
You may use any of the recipes listed below to make your favourite fish fry:
Luv Shn
|
No part of the content ( articles, photographs, recipes) of this blog may be reproduced without my written permission.Copyright © 2007-2010 Kitchenmishmash.blogspot.com. All rights reserved.
|
 ...a smell I had never sensed yet transported me to a place I have never been………a taste and flavor completely unknown yet easily conquered my taste buds……. a dish I had never tasted/seen yet recreated in our kitchen translating the words of an old woman - like “ mole….oru nullu manja podi……. lesham injeem veluthulleem…kurachu pacha kurumulaku kallil vechu chathachathu…...” - at the other end of the phone, sitting miles away from us, at the small village of Kainakary in Kuttandadu, Kerala….that was pretty much the story behind the Pepper Fish Fry I had blogged long back….and also the story behind the other five recipes labeled under Kuttandan Recipes which I learned from CJJ’s grandma who had played a big role in developing the food enthusiast in CJJ during his adolescence and youth.
In my earlier post, Pepper Fish Fry- Kuttanadan Special, I had mentioned that “his loving grandma was ready to share her secret to taste; fresh pungent peppercorns ground with a stone mortar and pestle and then mixed with the fresh ginger and garlic paste and yes, it is quite luscious. I got to taste the one with fresh peppercorns last time when we went home. But since the fresh peppercorns were something that’s unavailable here, I substitute with dried ones and still it was appealing to us.”
True, fresh peppercorns are a luxury at my corner of the world but at times I get lucky …….and my lucky stars winked at me last week and I got to lay my hands on some fresh peppercorns and the rest is history a delicious fish fry and a blog post!!
 Ingredients: - 17 medium size sardines/chaala/maththi or any other fish of your choice & size
- 4 medium strings of fresh green peppercorns/pacha-kurumulaku
- 3 cloves of garlic, medium size ( adjust as per your taste and strength of garlic)
- 1 inch piece of ginger
- ½ tsp turmeric
- 4-5 Curry leaves
- Salt to taste
- Coconut oil for frying
Directions: - Stripe off the peppercorns from its spikes; grind peppercorns along with ginger, garlic , turmeric and salt to a thick paste; tear off the curry leaves and mix well with the marinade and adjust salt. Make slits on the fish and marinate the fish evenly on both sides and keep it for 30 minutes to 2 hours to let the fish slices absorb the marinade. Heat oil in a flat non-stick pan and when it is steaming hot, place the fish gently and shallow fry at low-medium heat by flipping each side when it is done; do not crowd the pan and give some room for each slice; The cooking time varies depending the thickness of the slices and also depend on how crispy and firm one wants it to be. Overcooking the fish will make it very crisp; those who want it firm but soft and moist, may remove the cooked pieces when the oil stops spluttering.
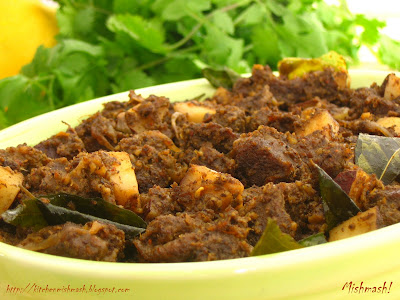
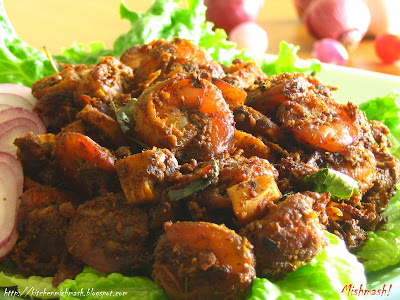
You may also check a handful of recipes I have learned from CJJ’s grandma:
    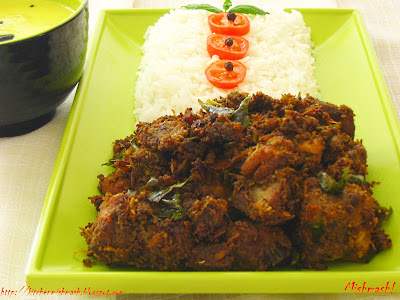
|
No part of the content ( articles, photographs, recipes) of this blog may be reproduced without my written permission.Copyright © 2007-2010 Kitchenmishmash.blogspot.com. All rights reserved.
|
 A forgotten taste from a lunch box…..that’s exactly what came to my mind , two weeks back when I was enjoying that plate of Aval Nanachathu. As I sat there and savored each bite, a murky memory of a similar snack wrapped me up, taking me back to those days when I looked forward to my friend M opening her lunch box during the break after three hours of lectures in the morning. If her rectangle box in red, was stuffed with white dampened beaten rice with flecks of yellow here and there, I had to get atleast a couple spoonfuls before she could satiate her hunger….I clearly remember how that natural sweetness of grated coconut gelled beautifully with the plump and white beaten rice and how moist it was even though her mother packed it early in the morning itself…..and the simplicity of the dish was further augmented by the natural sweetness from the tiny bits of our naadan nenthrappazham, a variety of ripe plantains available in Kerala. My taste-buds loved it though I generally preferred something very spicy for lunch time.
The visuals of my friend’s face and the taste memories she gifted me from her lunch box kept playing at the back of my mind for the last two weeks. Though I lost touch with my friend long back, I had never forgotten her, especially her mother. Both of them had a special place in my conversations with CJJ whenever I tried to paint a picture of those people who touched my heart and left their handprints on me. M’s mother was one of those unfortunate ones who had to confine herself to the four walls of her home because of a medical mishap that happened due to the carelessness of a medical practioner while conducting a surgery on her……..carelessness from the fraction of a second and she was a prisoner for a lifetime of infections and ill-health …..an imprisonment in her own house because of someone’s mistake!!
I met this woman personally only once at their place and it was hard for me to believe that she had been suffering physically all those years……though a frail and pale figure, with crevices beginning to form around her eyes, her face still beamed with a poised and warm smile ….and the ‘pottu’ , the red dot on her forehead gave a glow to her face and that day she made this snack one more time for me, knowing very well that I was quite fond of it.
As I was chewing on this slice from the past, I was also reminded of an incident M once shared with me. One evening when she reached home from college, a group of wage workers, transported from the neighbouring states, were concreting the street in front of their house and a bunch of their kids were playing around. To M’s sheer surprise, she noticed that all those kids were wearing frocks and shots in a very familiar fabric……the same fabric her mother had recently used for stitching a salwar kurta for M and it seems since she had some more fabric left from that, she made use of her leisure time and got some frocks and shirts and shots stitched for those kids!!!
The same woman who had so much of health issues and illness, spent hours in front of the sewing machine stitching clothes for a bunch of kids whom she had not seen until two days ago!! A selfless deed that brought smile on the faces of those innocent kids and a note of gratefulness & happiness on their parents’ faces……and the pleasure of giving she enjoyed ignoring all the physical discomforts she was going through………one of those very rare people who made me think that we can touch other’s lives if we want to and if we have the heart, irrespective of the situation we' re in!!!
This afternoon I tried to recreate that lunch box treat I had forgotten all these years but I missed that taste from M’s lunchbox! Here’s how I made it as a teatime snack:
Ingredients: - 1 cup white beaten/flattened rice ( vella aval)
- ½ cup freshly grated coconut
- 1/8 cup sugar or to taste
- 1/8 cup milk
- 2 pods of green cardamom, crushed ( adjust as per the strength of the spice)
- Half of a ripe plantain, quartered into small bits
Directions: - In a plate/mixing bowl, blend grated coconut, sugar and crushed cardamom pods by mixing with hands. To this add beaten rice/vella aval and milk and start crushing and squishing with your hands; combine everything until beaten rice is soaked and plump; check if you require more sweetness and adjust accordingly and finally add the ripe plantain bits and mix gently. If it is not moist yet, you may add one or two tablespoon extra milk and combine everything by mixing with hands.
- Serve with tea/coffee as an evening snack
Related Posts:
We wish you all a beautiful, warm and fun filled ONAM !
Luv Shn
|
No part of the content ( articles, photographs, recipes) of this blog may be reproduced without my written permission.Copyright © 2007-2010 Kitchenmishmash.blogspot.com. All rights reserved.
|
 Most of us grew up in Kerala would be having a delectable taste memory we share in common……a slice of the past we take pleasure in, when we dive into the repository of our thoughts and memories….the picture of the whole family leisurely enjoying or having a casual chat over some humble Kappa Puzhungiyathu/ boiled cassava by dipping into a hot and fiery Mulaku chammanthi/green chilly-pearl onion relish, with a glass of hot tea or coffee, in the evening . I hope I am not generalizing wrongly here!
Atleast, that’s the one and only picture that comes back to me whenever I relish or think of this snack. Whenever I crave for it or get wrapped up in a cloud of nostalgia, I try to rekindle those memories not only by making that combo but also by recreating the same atmosphere at home, to nibble those soft and creamy cylinders with a touch of heat from the green chillies married beautifully with the flavor and fragrance of coconut oil ………and the sensuous pleasures my taste buds experience immediately unravel the treasure chest of memories and take me closer to the picture of my family, sitting around our dining table after a work/school day…….my brother’s lips and nose and his entire face turning red because of the heat from the green chillies…….my mother sitting in one corner, analyzing the quality of her loot, sometimes telling herself, “mm….ee pravashyam nalla kappa-yaa kittiye” meaning this time cassava was of premium quality ….and me and my father sitting across each other and taking pleasure in each dip and each bite …..and my parents pouring a small share of their tea into my glass after a lot of my begging ……even at a tender age, I knew I could feel “the completeness” only if I wash it down with some hot tea/coffee. It’s a taste sensation I wouldn’t dare to give up for anything else!
Though Kappa/Cassava is so common in Kerala and easily spotted at most backyards and freely available in markets, I don’t remember my family buying it from the local markets. For us, we always got our share from our aunts’ or uncles houses. At times, we cultivated in our small yard itself and that happened every year, when my father hired a wage worker to clean up the yard and remove the weeds. At the end of the day, my father always instructed the worker to plant some “kolli”, aka cassava stems in some 10-15 inch length. Though my parents always complained about the poor quality of the soil and stayed away from any type of cultivation, this was a routine that was repeated almost every year as it grew without any particular care or fertilizers.
I also have a murky memory of a “Kappakkaran”/cassava seller, visiting our neighbourhood, by pushing a four wheeler covered cart, loaded with farm fresh kappa/cassava, and calling out “kappa…kappa…kappeiii…” at the top of his voice. My mother used to rush to our front gate to check out his bounty of harvest and after a quick and brief bargaining session, he would lift his old fashioned balance scale – like the blind justice holding the scale – and place kappa/cassava in one and weights of different sizes in the other….”katteem thrassum” as we say in our mother tongue and trust me, I never remember that needle or scale balancing correctly, the one with the weight was always hanging a bit low!! Well, he made some small profit and we got some good quality kappa/cassava, so atleast that balanced correctly on the scale, I guess!!
 Last weekend, surprisingly we were lucky to find some fresh Kappa/cassava/yucca root in our local store. Though I could hear the craving department ringing the bell at its top, this time I was sensible and had gained enough experience to break the root into two pieces ( Oh yeah…I was like a He-Man trapped in a female body!) to see if the interior flesh is white and does not have any discoloration or brown dotted lines. Once the quality check was passed, it was time to recreate my homeland’s humble culinary pleasures in my current foster home!
Kappa Puzhungiyathu (Chendamuriyan Kappa)/ Boiled Cassava Clean Kappa/Cassava by removing the outer brown skin as well as the pink skin inside and cut them into 2 inch cylinders or cubes and rinse them in plain water. ( Note: Inji’s pictorial will clear all your doubts on cleaning and getting the cassava pieces ready for cooking.) Fill a large saucepot with cold water, enough to cover all pieces of Kappa/Cassava and bring to a boil. At this stage, drain the boiling water and fill the pot again with some cold water, add salt and cook cassava until it is tender and soft, when pierced with a fork or knife. Drain the excess water and now it is ready to serve.
Mulaku Chammanthi/Green chilly-pearl onion relish
Ingredients: - 8-10 small red pearl onion/kunjulli
- 5-6 Indian green chilly ( adjust as per your tolerance as well as the heat of the chillies)
- A tiny piece of tamarind/vaalan-puli ( as tiny as a green pea or peanut)
- 1 tsp coconut oil
- 2 leaves of curry leaf (optional but recommended)
- Salt to taste
Directions: Old fashioned Method: if you have the luxury of owning an old fashioned flat grinding stone, Ammikkallu, place pearl onion , green chillies and tamarind and crush well with its elongated rolling pin made of stone. Scrape everything with the edge of your palm and transfer the crushed mixture to a bowl, tear off the curry leaves , add salt and drizzle coconut oil and mix everything well and serve with boiled Kappa/cassava plus tea/coffee. If you do not have that luxury, try to recreate the same steps/process in a tabletop mortar and pestle. The crushed mixture would look somewhat similar to that in the above picture.
Quick n’ Easy Method: Put pearl onions , green chillies and tamarind in the smallest jar of the mixer/blender/food processor and pulse 5 or 6 times or until you get a coarse paste/mixture. Transfer the crushed mixture to a bowl, tear off the curry leaves , add salt and drizzle coconut oil and mix everything well and serve with boiled Kappa/cassava plus tea/coffee.
Kaanthari Mulaku Chammanthi – Back home in Kerala ,we get a very fiery hot variety of green chilly called Kaanthari Mulaku, which I assume is known as Bird’s eye chili pepper too . We make use of this particular variety for making Mulaku Chammanthi/ Green chilly-pearl onion relish, in which case, please make sure that you reduce the number of chillies uses as they are fiery hot.
Related Posts:
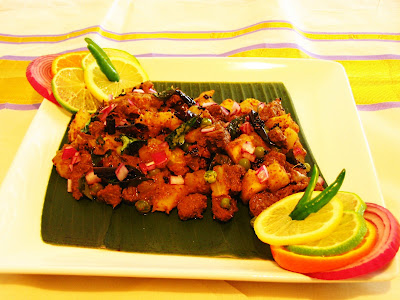
Updated on Aug 24, 2009 : According to Kitchenfairy and Maria, Kappa Puzhungiyathu/Boiled Cassava is known as Chendamuriyan Kappa in their region. Thank you for letting me know about this and I have updated my post as well as the title of this post. The name sounds very sweet and I assume that the name comes from its close resemblance to Chenda , a type of musical instrument used in Kerala , that has a cylindrical shape.
Luv Shn
|
No part of the content ( articles, photographs, recipes) of this blog may be reproduced without my written permission.Copyright © 2007-2010 Kitchenmishmash.blogspot.com. All rights reserved.
|
|
|
|
|


 All text and Photographs are copyright protected.
Copyright © 2007-2010
Kitchenmishmash.blogspot.com. All rights reserved.
All text and Photographs are copyright protected.
Copyright © 2007-2010
Kitchenmishmash.blogspot.com. All rights reserved.